How To Make Pour Over Coffee 101
It’s kind of funny when you think about it. With all the technology we have available— the automated latte robots and espresso machines with price tags to match a small car. Still, one of the most prized forms of brewing is one that we make using our own two hands and a few bits of low priced gear.
I’m talking about pour over coffee. Anything from a Chemex, Kalita Wave, or Origami dripper, to the classic Hario V60. The idea is simple: pour some hot water over some coffee. But how this simple task is done makes a huge difference in the brew.
So without further ado, let’s learn how to make a scrumdiddlyumptious pour over!
What Is Pour Over Coffee?
While pour over coffee is usually associated with Japan, it was actually invented in Germany. That’s right, German national Melitta Bentz invented pour over style brewing, back in 1908. Now, I know what you’re thinking: is that the Melitta? Melitta, as in, the brand that sells coffee, filters, and brewers in supermarkets today? Yes indeedy.
So what exactly is a pour over?
Pour over is a form of percolation brewing. It’s filter coffee. Essentially it’s a vessel (i.e. V60, Chemex, Kalita Wave, ect…), with a paper filter, and coffee grounds. Hot water is poured over the coffee bed. As it passes through, the water dissolves a percentage of the coffee grounds and coffee oils. The water flows from the bottom of the brewer as liquid filter coffee.
If I were to narrow it down to one word to describe pour over coffee, the one I’d pick would have to be ‘transparent’.
With only water, gravity, and our technique, the pour over method can really bring out the flavor of each coffee. It can taste incredibly light— almost tea-like. But it can also be insanely juicy, with as much intensity and mouthfeel as red wine. It all depends on the coffee’s inherent traits.
Filter coffee from a pour over can only be as good as the coffee, and the water that goes into it. If you are using excellent beans, even with terrible technique, your brew will still probably be pretty tasty. And likewise, no matter how good your technique is, if your roasted coffee beans are awful, the cup quality will be the same.
The pour over method, when done right, will bring out the best in most coffees. You learn what to tweak and how. This allows you to make coffee that tastes as good it does in a specialty coffee shop.
Why Use A Pour Over Coffee Maker?
For many of us, brewing coffee is nothing short of a ritual. This probably doesn’t need to be said, but when I say ritual, I don’t mean the Satanic, goat sacrificing kind. I mean the slow, deliberate, attention paying kind. There is a lot to love…
It’s a Meditative Process
Each part of the brewing process— whether that be the water temperature, the grind size, or pouring pattern, has an effect on the final brew. And each part is adjustable. This gives us a tremendous amount of control when brewing coffee.
We can just keep on tweaking different things until the coffee tastes good. Though the same could be said for pretty much any brewing method, with a pour over we physically control how the water touches the coffee— a control that no other brew method can offer.
Plus, brewing coffee using a pour over is slow. It takes time. The perfect way to start the day.
It Tastes Like Nothing Else
The resulting coffee from a pour over is like nothing else. We’re talking ideals here, but a pour over brew is sweet and clean. Transparent. And the cool thing is, if we want more acidity, so long as the coffee has more to give, we can bring it out. The same thing goes for sweetness.
If there was ever a brew method to taste those often far out notes written on the bag, it’s now. With a pour over maker.
Its Inexpensive to Brew With
A plastic Hario V60— about $10. Paper filters— another $10. A hand crank burr grinder like the Hario Skerton Pro— $50. And a bag of good coffee— say, $20. That’s $90.
And that’s all you need to spend to get started brewing coffee. Sure, if you become geeky about it you can easily spend a thousand. But you don’t need to.
The essential tools to get started are incredibly affordable. Add in a scale and a gooseneck kettle and you’ll be able to really dig deep into pour over brewing. Legitimately experiment with different pouring techniques and keep brewing better and better coffees.
Anyone Can Do It
Many other brewing methods, including but not limited to espresso, require a decent amount of training before using the machine. Getting delicious results from an espresso machine runs a fine line between science and craft.
A pour over is a simple way to make coffee. Everything is done by hand, meaning anyone can do it. If you can pour water from a kettle, you can brew a pour over.
How To Make a Pour Over Coffee
What’s left to do now but brew some coffees? I’m going to run you through exactly what you’ll need to brew pour over coffee, before taking you through my favorite method.
The Equipment You’ll Need
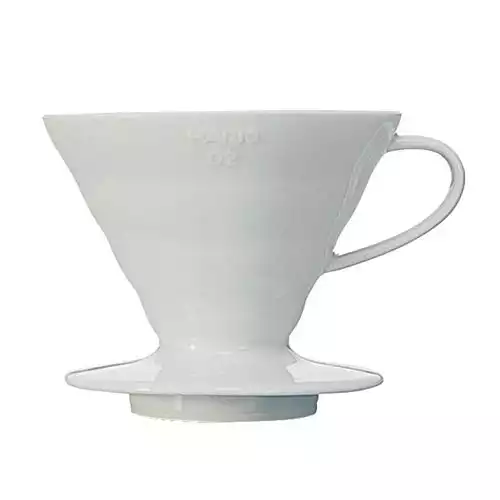
Pour Over Cone
First, you’ll need to decide on your pour over device.
There are really three main shapes for pour over brewers. Cone-shaped, like the V60 or Chemex, flat bottom, like the Kalita Wave, and what I’ll call the wedge-shaped, like the Melitta. Each shape is capable of brewing delicious coffees.
Which shape is the best? That’s up to you.
Many people say that flat bottom brewers are easier to use. Because brewers like the Kalita Wave have multiple small holes in the bottom, rather than one big one, they control the flow rate for you. You don’t need to worry so much about the grind size. Flat bottom brewers, for me, produce heavier brews. Whereas a V60 will be more delicate.
So if you can, get both! A flat bottom and a cone-shaped coffee maker. You can have a lot of fun trying the same method on both shapes and comparing the two. If you can’t or don’t want to get both, close your eyes and choose one. You won’t be disappointed by either choice.
The method we’re using today will utilize the humble Hario V60. But you can easily do a similar thing using a flat bottom Kalita Wave. In case you’re using a Chemex, check out this handy brewing guide for some specific details around using this kind of pour over.
Filter Papers
Can’t brew a pour over without coffee filter papers! I’m not overly fussy when it comes to filter papers. So long as the filter doesn’t have too much of a taste, I’m happy. With that said, try to avoid the brown, unbleached filter papers. They usually have the strongest taste. It’s a weird, cardboard kind of thing— not the nicest flavor to add to a pour over!
The standard Hario and Kalita papers I find pretty good. Feel free to try other papers and see what you like. Some filters will make your brews faster, and some will slow them down. Whatever you decide, adjusting your grind size can remedy brews that are either too fast, and too slow.
Burr Grinder
Pour over brewing captures the best flavors and aromas of coffee. To really take full advantage, you need to have your own grinder. It doesn’t have to be the absolute best grinder, and it doesn’t need to cost $500. It can be as simple as a $50 hand grinder.
A grinder is your most valuable coffee making tool. More so than the filters or even the brewer itself. A grinder is responsible for taking our beautiful baby coffee bean and cutting it evenly. The water can then extract all the little particles of ground coffee the same amount. This is what will produce the tastiest cup of coffee.
When choosing a grinder for making a pour over, go for a burr grinder. Electric or manual— doesn’t matter. Steel burrs are preferable, but ceramic burrs are ok too. Steel burrs tend to last longer and are less prone to chipping.
If your budget will allow, go for a flat steel burr grinder. These will offer the most consistent grind, while being durable. If you just want something to get started, a Hario Skerton Pro or similar will be more than enough to start brewing some truly delicious coffee.
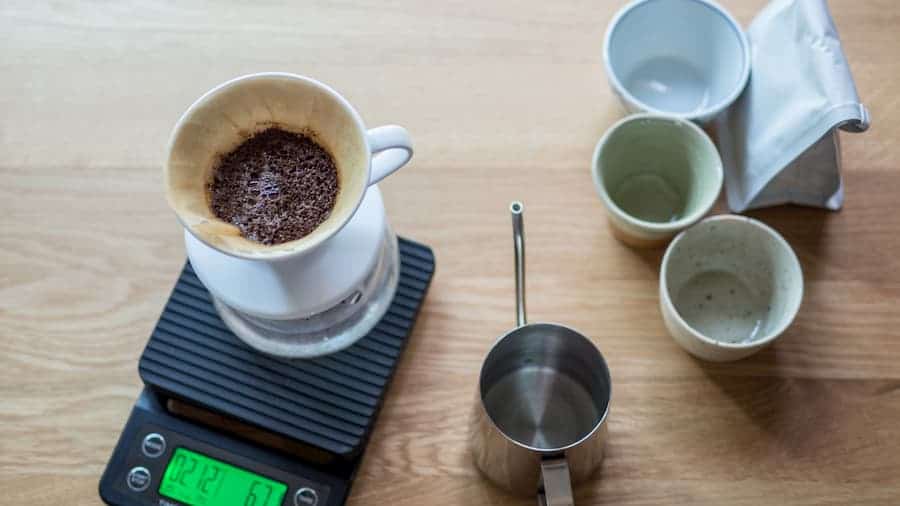
Digital Scale
While a scale isn’t essential for brewing itself, it is essential for being able to replicate a method again and again. We can use the scale to weigh out our dose, then we can use it to pour exact amounts of water over the coffee bed.
Some digital scales also come with a timer— super handy and means you don’t need to bring out your phone’s timer every time you brew.
When choosing a set of scales, here are a few things to keep in mind:
- It must be digital.
- Must be accurate.
- It needs to be able to measure in 0.01 gram increments.
- Should be fairly responsive.
- Should be rechargeable or battery-operated (ie. no cables or wires.)
Hario makes a nice little scale that many people love. It looks good and has a timer. To be honest though, so long as the scale is accurate, fairly fast, and can measure in 0.01g increments, you should be good. Check out our coffee scale recommendations if you need some help buying one.
Again, the scale isn’t essential to begin with. If you are just getting started and want to give pour overs a go, you can do so without the scale. Just use a measuring jug and a tablespoon so you know approximately how much water and coffee you are using.
Gooseneck Kettle
A gooseneck kettle allows us to pour the water with precision. We can control the speed of the water, as well as exactly where the water is being poured over the coffee grounds. Plus, gooseneck kettles are super fun to use, and some look really beautiful (I’m looking at you, Fellow Stagg!).
The gooseneck kettle is another non-essential item. Just getting started, you don’t need one. You can use a simple electric kettle, no problem.
But if you do start to make pour overs daily, you’ll eventually crave the control that a gooseneck kettle offers. Especially as you experiment with the number of pours and pour intensity.
Picking The Coffee
Last, but certainly not least, we’ll need a bangin’ bag of coffee. You can make pretty much any good coffee work as a pour over. I will put emphasis here on the word ‘good’. As I mentioned earlier, even the World Brewers Cup Champion can’t make a terrible coffee taste good.
As far as roast goes, any roast can work. Dark or light— it’s all personal preference. I love light roasts. The florals, the sweetness, and the vibrant acidity— that’s totally my thing. I don’t want to be able to detect any ‘roasty’ flavors. Even the slightest hint of charcoal or smokey flavors and I’m out! But that’s just me. You might love that kind of thing— many people do. If so, check out our list of light roast favorites to find something that might tickle your fancy.
Many roasters will roast coffees for either filter or espresso. The filter roasts are usually lighter than the espresso roasts.
Most importantly, choose a coffee that sounds appealing to you. Almost all coffee roasters put tasting notes on the bag. Read those notes— if it sounds good, give it a try. If you like fruity coffees, then try something from Eastern Africa. Prefer a chocolatey vibe, give a Brazillian coffee a go.
Pour Over Brewing Guide
Let’s get brewing!
This method is my favorite way to make drip coffee. I’m yet to try it with a coffee and have it fail me. This has its sights set on sweetness and acidity.
This method uses a 1:16.6 ratio of coffee to water. Meaning: 1 part water, to 16.6 parts ground coffee.
This will present a nice balance of sweetness and acidity, with some good strength, without being too much. If you do like your coffee a little stronger, you can bump it up to a 1:15 ratio of coffee to water. Most pour over recipes will use a coffee to water ratio of between 1:15 and 1:17.
So here’s what we’re going to do— we’ll brew a carafe of delicious coffee. 600ml. Enough to be generous to two lucky people.
What You’ll Need
- Hario V60
- Paper filters
- Carafe or mug
- 36 grams of coffee
- Boiling water (make sure it is fresh water, and is clean and filtered)
- Grinder
- Digital scale
- Timer
- Spoon or stirring paddle
- Gooseneck kettle (optional but recommended)
Step 1
First, put around 800ml of water on to boil. This will be enough to brew with, as well as rinse our filter and preheat everything.
Step 2
Weigh out 36 grams of coffee and grind it at a medium fine setting. We are using a finer than usual size for our coffee grounds. Go for a texture similar to table salt. Your taste buds will help guide you to the perfect grind size, so take notes of the setting you use!
Step 3
Add a paper filter to the V60, and place the V60 on the carafe.
Step 4
By now your water should be boiling. Transfer the boiling water from the kettle and into the gooseneck kettle. If you are heating your water in the gooseneck, skip this step!
Start by pouring water through the filter— just enough to saturate the whole thing. This will wash away any papery taste from the filter, and it will preheat the brewer and the carafe. Let the water drip through into the carafe then discard it.
Step 5
Place the V60 and carafe onto the scales, then add the ground coffee to the V60. Give the V60 a little shake to level out the coffee grounds. Now poke a little hole with your finger, just like you are about to plant a seed. Press tare on the scale and have your timer ready.
Step 6
This first pour of water is called the bloom. It will essentially wet the coffee and allow some of the trapped C02 gas to be released. This phase will ensure the rest of our brew goes smoothly and evenly.
Press start on the timer and quickly pour 80 grams of water over the coffee bed.
Try to pour evenly to saturate all of the coffee. Now take your spoon and dig around in the coffee bed. The goal here is to ensure all the coffee is wet. We don’t want any dry bits. Excavate and keep excavating until it’s all nice and evenly wet.
Wait until the timer reads 0:45 seconds before moving onto the second pour.
Step 7
At 0:45 seconds, we’re going to pour up to 360 grams. Pour slowly and in a spiral pattern, starting in the middle of the bed and working your way outward to the edges.
Try not to pour too much water straight down the filter. We want to mostly just hit all the coffee. If you see any dark bits of coffee, pour water over them. Again, it’s all about evenness, so try to make the entire brew bed look the same.
This pour should take around 30 seconds or so. A little longer is ok, but don’t pour too much faster than this.
Pick up the V60 and give it a swirl. This will level out the coffee bed. Now we’ll wait until the timer reads 1:30.
Step 8
Once we reach 1:30, we will begin our final pour. We want this last pour to take about a minute.
Slowly pour in a spiral motion, starting at the center and working your way outward, then back in. Take your time and do this pour gently. You should be at the target weight of 600g when your timer reads 2:30.
Now give the coffee and water a stir— just two stirs in the North to South direction, and two East to West.
Let the coffee drip through, into the carafe. The brew should be finished by 4 minutes, total.
Pour into a couple of mugs for you and a loved one, and enjoy!
Troubleshooting
A quick few notes on what to do if your brew using this method ISN’T tasting delicious.
- Let your taste buds guide you. If your coffee is tasting bitter, grind coarser. If it is tasting weak, thin, and lacking sweetness, try a finer grind.
- Don’t let the end time be too much of a deciding factor. Taste is always the most important. If the brew takes 5 minutes to finish, it might still taste great. Use your head here and experiment.
- If you want to make a smaller amount of coffee, say 300g, simply half the water and coffee in this recipe. Total time for a 300g brew should be around 3:30.
- Always use good quality water. Water for drip coffee should be clean and ideally, filtered.
Frequently Asked Questions
How do you make pour over coffee without a scale?
You can use a tablespoon to measure whole coffee, and a measuring jug to measure out the water. One tablespoon holds around 7 grams of light roasted coffee.
What kind of coffee grounds for Pour over?
While each method calls for a different grind size, most methods sit firmly in the medium size range, this is the same regardless if you use a Chemex or V60 for example.
Split the difference between an espresso grind and a French press grind and you’re in a good place. Something similar to raw sugar.
What is the best pouring technique?
Pour at a steady speed. Don’t speed up or slow down too much. Pour from a height just before splashing occurs. If you are pouring and the water is splashing as it lands, lower the tip of the kettle and pour from a slightly lower height.
Make sure you pour evenly over the coffee bed and don’t focus too much on any one spot.