How To Clean A Coffee Maker
Coffee makers are a staple in most households and offices. And while stored among other tools and equipment for food, for some reason, it doesn’t register as something to be cleaned as often. Or the right way for that matter.
If you use your coffee maker daily there’s a high proability that your machine requires a good wash by the time you read this, so let’s get right to how to clean a coffee maker.

Why you need to clean your coffee maker
Like most organic substances, coffee can go bad. Yes, even black coffee that’s only made up of coffee and water!
Have you ever left a pot of black coffee sitting for a couple of days? It develops a mould that looks like thin cotton balls. It’s easy to avoid consuming in this state because we see it as it is.
What’s scary is the stage BEFORE it goes that bad. As the moulds start to form, damaging compounds called Mycotoxins start to become mildly perceptible by taste. Usually, this is when your usual cup of coffee tastes murky or “off”. We sometimes attribute the off-taste to the cup, the water used, or even a possible cold coming on–everything but a dirty coffee machine.
At this stage, it would already be ideal to cleanse a coffee machine instead of just a cup or a server, and way before the cotton balls come out.
While these aren’t immediately harmful, over time, the adverse effects from repeated exposure add up. So why risk exposing yourself to mild carcinogens when all that needs to be done is maintain a clean coffee machine
limescale is a coffee taste killer
Another reason to clean a coffee machine would be to get rid of limescale build-ups. These occur as reactions from heat interacting with the minerals in hard (or mineral) water. They come out as white or yellow calcium deposits, and these tend to have an effect on your boiling temperature and the natural flow of hot water throughout your coffee maker.
Perhaps the most practical reason though, for learning how to clean a coffee maker, is to do your beans and your coffee justice.
Once you have a good selection of beans and the right kind of water (mineral) for brewing, it’s awful to taste the result tainted by a dirty coffee maker. Cups of well-brewed coffee can automatically change your mood for the better!
If you can learn to do such a small part of your day right, not only will your cup of coffee immediately more enjoyable. It could also be an added component of a good routine that should only positively affect other aspects of living.
How to clean your coffee maker depends on your machine
Cleaning frequency depends on the usage rate, so you can keep track per cup. But if your coffee demand is pretty regular, you can set a regular schedule for cleaning your coffee maker instead.
Coffee maker cleaning is a simple enough process that usually involves nothing more than water and white vinegar. The acidity of the combination of the 2 cleanses the inside of the coffee maker, as it’s running a brew cycle.
Below are the usual types of machines found at home, and some easy guidelines on how to clean them.
Cleaning a traditional coffee machine
This is the old faithful. The kind of coffee maker back in the day that you would see old people get brews from in their homes, offices, and restaurants. What’s great about this machine is that it requires no attention, and therefore saves you so much time!
You add coffee beans, prepare the water, do your routine, and grab that cup ready-to-drink.
The problem? It’s so easy to use that even maintenance and cleaning are afterthoughts. Below is a quick and easy way to clean your machine.
Your home batch-brewer will require white vinegar and water, 4 cups of each prepared.
Instructions:
- Make sure the coffee maker is plugged in and switched off.
- Leave the bean filter inside, but take out the water filter (if any).
- Pour in the undiluted 4 cups of white vinegar into the water compartment.
- Switch coffee maker on.
- After 2 cups worth of vinegar has gone through the machine, switch off the coffee maker and let the remaining 2 cups sit for 30 minutes.
- After 30 minutes, switch the device on again and let the remaining vinegar run through the coffee maker.
- Immediately rinse off residual vinegar with water by running it through the coffee machine as needed.
- Make sure to let the coffee pot catch the vinegar as well so it can do its job there as well.
- Repeat at least once a month or every 100 cups.
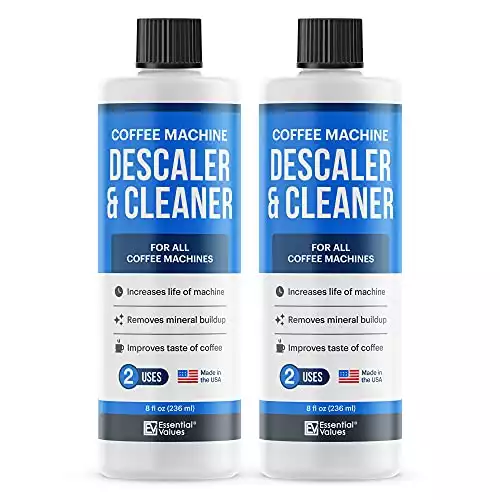
Otherwise if you want a pre-made and highly rated cleaning solution I’d recommend checking out the 2 choices below:

The Home barista coffee machine clean
For those of you who have the joy and luxury of having espresso machines at home, I have good news for you: it’s easier to wash and maintain there than it is at a busy cafe.
The guidelines are similar–rinse portafilters and group heads every day with water, and descale every 100 cups made for good measure (including calibration shots).
Try to count your calibration shots on average, then add on the coffee cups you drink in a day, and compute the number of days you need to get to 100.
Your cleaning kit will still consist of equal parts of water and vinegar. These are meant to be used for the group heads only, as it is best to let professionals descale the insides of your coffee maker. Choose a supplier with an excellent AFTER-SALES service.
Your machine will usually come with descaling tablets or machine detergent to help with maintenance. If it doesn’t, as mentioned above, your trusty-but-delicate coffee maker will need a bit more care than the machine before it discussed above.
The problem areas are usually the portafilters and group heads.
- Backflush your machine by using a blind basket (the one with no holes) in your portafilter, and locking it into the group head as you pull a shot.
- You may add your vinegar solution (1 part water, 2 parts vinegar) to the blind portafilters as you backflush.
- Take out portafilter, discard residual used coffee grounds, and repeat step 2 until there are no more loose, used grounds when you backflush.
- Next, disassemble portafilters (it’s best to do it in a bowl so as not to lose any parts in the process and submerge in hot water and vinegar. Give enough time until it cools.
- When cool to the touch, take out portafilter/s and basket/s. Check for any remaining coffee residue and wipe or brush as needed. These should be easy to get off by now. Reassemble and store all parts.
- Run hot water through the machine group heads, the portafilters, and all surfaces where coffee grounds come into contact with the machine.
If you already have a coffee machine with not so great after-sales service, there’s still hope. Use a diluted vinegar solution to protect the insides of the machine.
Be sure to read the manual to ensure that none of the parts can be damaged by vinegar, thus preserving warranties and keeping your rights reserved.
- Take time to prepare a 1:1 mixture of water and white vinegar to soften the acidity.
- Put this solution in the water reservoir (for single group head machines), and about 4 liters total for 2-3 group head machines, filling them only once, and purge thoroughly. Remember to use normal cycles of pulling shots so as not to overwork your boiler with a quick constant purge. Watch the pressure gauge and make sure that’s within normal ranges at all times during the descaling.
- Let normal water run through the machine next, to wash off the vinegar (failure to do so will carry your cup’s acidity way past Ethiopian bean levels i.e way too high!)
- As always, record the date you cleaned to keep track of a pattern or frequency of cleaning your coffee machine.
Cleaning Manual Brewing equipment
Since you’re already here, there’s a good chance that you also have at least one coffee maker among them. These could have been your first coffee maker, or your back up one. However, they need to be appropriately cleaned just the same. It takes very little time to ensure health, quality, and safety!
Perhaps the hardest part to clean among these is the metal filters. We end up using them because while the paper filter is easy to dispose of, some feel that they are wasteful.
Now back to cleaning a metal filter along with the rest of the coffee tools.
If you are using a coffee maker with a metal filter, gather it along with the other parts that come into contact with hot, hard water. We will only be using vinegar and water to clean. Here are the steps:
- Prepare a vinegar solution of 1:1 for the coffee pot and metal filter.
- Take a large bowl where you can submerge the coffee filter and coffee pot in a vinegar-water solution.
- Submerge, let sit for half an hour.
- After 30 mins, rinse with water, dry, and store.
Can you use a dishwasher?
Theoretically, some will have the proper dimensions to accommodate your equipment.
But why risk it?
Coffee equipment (pots included) are best washed right away, WHILE they’re hot. This is so the coffee residue is easy to rinse off with water.
We avoid using any form of soap at all costs because it affects the TASTE more than anything. While they should be used in the interest of safety (in case those nasty molds have already shown up, or just to get rid of those coffee ground crusts in hard-to-reach areas of your coffee maker).
Rinsing and re-rinsing until the smell is gone is way more complicated than just getting used to cleaning your coffee maker right away as you use it.
It is for these reasons that using a dishwasher is only ideal for you (in the short-term) but not your coffee maker. You save time by being preventive with best practices when it comes to cleaning your coffee makers.
Accessories need a wash too!
Ever heard of the saying you can’t fight fire with fire?
Well, in food and beverages you can’t clean with dirty. Especially with a coffee maker, where you mostly use water.
Be sure that your cleaning accessories pass the eye and smell tests before being cleaned right before use under running water. Nothing should be abrasive for the pots and smooth surface of your coffee maker.
Sponges should be 2 weeks old MAX.
Cleaning Tips
When it comes to cleaning a coffee maker, using the proper methods (and accessories), and equipment-friendly compounds not only allow you to use them at their best–they keep the coffee makers around for much longer as well.
Remember to use hot water to soften the hardened residue in your coffee maker. How to clean these stains off without soap is to rinse them off when they’re fresh, to begin with.
Since vinegar and water aren’t the most robust solutions on earth, use time and patience to work the calcifications and residue off. You won’t get all dirt off in one go sometimes, so you just have to clean better, more often.
As a bonus, you don’t void any warranties by staying basic, keeping all your rights reserved, so when you send your machine for maintenance, you get your coffee maker back with no additional problems.
Summary
Now that you know how to clean a coffee maker mold and mildew using effective and inexpensive household items, the only thing left is going out there and doing it.
Coffee maker cleaning is an often overlooked action, but slightly tweaking your workflow will benefit your health, improve your coffee’s taste, and prolong the life of your coffee makers.
All you need is a little more time each day, and you will end up with tastier and cheaper coffee in the long run.
Frequently Asked Questions
How do you deep clean a coffee maker?
Chemicals and solutions can usually be bought with instructions on how to clean coffee maker calcifications and deposits.
However, a more simple solution is just to use water and vinegar regularly to get rid of mineral deposits over time.
How much vinegar do you use to clean a coffee maker?
While you can generally pure vinegar to clean a coffee maker (unless stated otherwise by your equipment supplier), vinegar can also be diluted with an equal amount of water to be safe.
How often should you clean your machine?
It’s widely accepted that coffee equipment accumulates enough residual fines and oil at 100 cups.
So as a general guideline, when your machines or accessories have made the equivalent of 100 individual cups, it’s time for you to clean your machine.
In between? Ensure to rinse the machine parts to avoid deposits affecting the taste of your brews.
How do I clean my coffee maker without vinegar?
If you’re machine doesn’t need a heavy duty clean you could try soaking parts in hot water and using a sponge.
Otherwise, you can find pre-made solutions which also work well.