Learn How to Roast Coffee Beans 4 Different Ways
Does roasting coffee at home seem to belong in the category of superhuman powers? You know, right up there with making fine French pastry or the perfect sourdough bread.
Actually, roasting your own coffee is not as hard as you may think. To get started, all you need is some basic equipment and a bit of knowledge about coffee chemistry. And no, you don’t necessarily need a dedicated coffee roasting machine to dip your toe in the water.
Buying coffee off the shelves of your local supermarket is certainly a lot easier than roasting your own coffee. After you savor freshly roasted coffee, though, you’ll realize the effort is worth it.
Let’s dive in to learn how to roast coffee beans at home.

Need To Knows: Before You Roast Your Own Coffee At Home
I’m a coffee professor at a university, and one of my favorite classes is the coffee roasting class.
I get a huge thrill as I watch my student’s amazement when they learn how to roast coffee beans. They heat up the roaster, load in the beans, and then smell the sweetness of the bean’s sugars caramelizing. And their concept of coffee changes drastically.
You can have that same coffee roasting experience at home.
It’s not a long process. In fact, coffee beans roast rather quickly – you can have a light roast in a home coffee roasting method in less than 10 minutes. That also means you need to keep a sharp eye on those beans – don’t get distracted or you may have charcoal!
First let’s go through the coffee roasting stages so you know how to roast coffee beans and what to expect when you roast coffee at home.
Coffee roasting stages
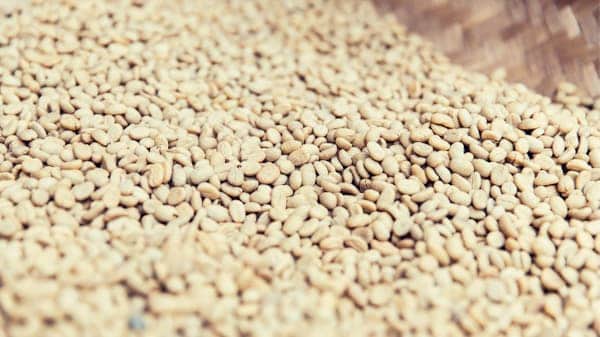
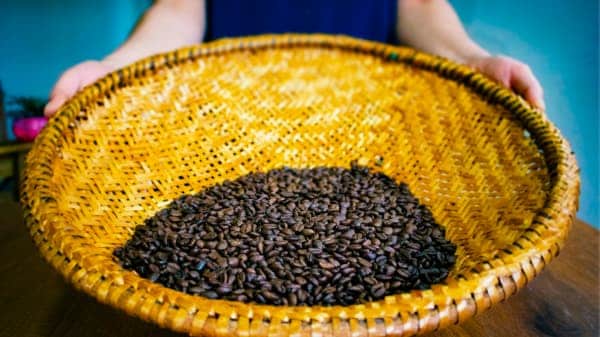
Unroasted coffee, called green coffee, is a greenish-gray color. Green coffee beans don’t look that appealing and don’t smell or taste that great. They’re a far cry from the roasted coffee beans that you’re used to. Green coffee beans will taste grassy, rather like raw peas, and will make you happy that someone discovered the benefits of coffee roasting.
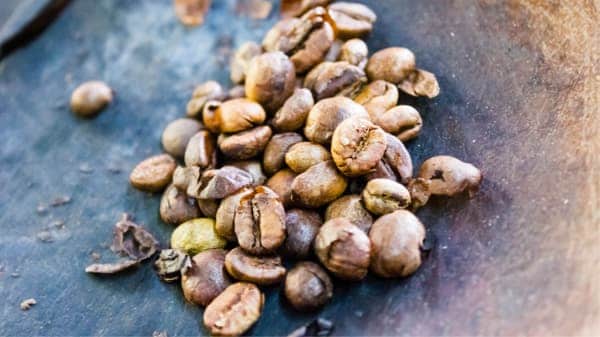
As heat is applied during the roasting process, the green coffee beans gradually change to yellow, then light brown, and then continue through the darker shades of brown. Overall, there are 4 main types of coffee roasts.
Stage 1: Yellow point
When you begin the roasting process, the first part is the least exciting.
Depending on your roaster, this stage will last a few minutes, and it’s simply when the beans dry out. Professional roasters generally start with a lower temperature, about 320 degrees Fahrenheit (160 degrees Celsius).
Stage 2: Browning stage
The browning stage of the roasting process is when the real chemistry begins. You’ll know you hit that point when you see the coffee bean darkening and smell the aromas intensifying.
This is when the Maillard Reaction starts to happen. Don’t get startled by the name; it’s what happens to anything that gets cooked. Think of the moment you put that steak on the grill or those chocolate chip cookies in the oven.
Those enticing smells come from the heat transforming the sugars and amino acids. In the coffee roasting process, hundreds of compounds start changing and new ones are created.
This is when the flavors, aromas and colors begin to develop and the beans begin to resemble the roasted beans we’re so familiar with.
Stage 3: The Caramelization Process
The next stage in the roasting process is when the sugars in the coffee bean start to caramelize. This happens when they hit around 338-392 degrees Fahrenheit (170-200 degrees Celsius). During the caramelization stage, aromatic and acidic compounds begin to develop.
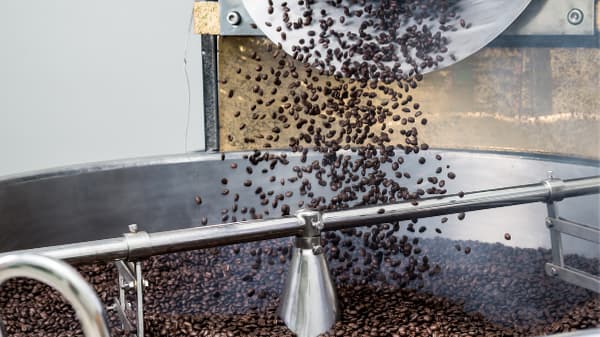
Stage 4: First Crack
At around 401 degrees Fahrenheit (205 degrees Celsius) the water inside the beans begins to vaporize. The structure of the beans breaks down and oils begin to migrate out of their little pockets within the bean. As the energy accumulates inside the weakening bean cells, something exciting happens.
The beans start to crack. Yes, you’ll hear a cracking sound that sounds like corn popping. The crack you’re hearing is the bean exploding. Appropriately, this stage is called the first crack.
At this point, the bean doubles in size and loses about 5% of its weight. After the beans start to crack, you want to take your time to develop aromas and flavors. If you don’t, the coffee will have unpleasant flavors – it may taste flat, bitter, smoky, or ashy.
At this point in the roasting process you can consider your beans to be roasted. Sometimes this roast is called City Roast. How much longer you roast your beans depends on your taste.
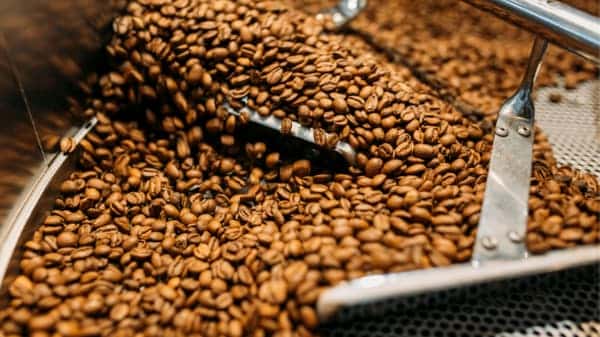
Stage 5: Roast development
As you continue to roast your beans, a lot is happening. Caramelization continues, oils migrate out of the bean, and the bean continues to expand in size as the roast becomes darker.
This is when you get to decide aspects of the roast character, like how much acidity will be in your beans and how much body. You have less than two minutes to do this, so don’t blink or you’ll miss it.
This is one of the most crucial stages. You want to control the temperature very carefully. Try to keep the temperature stable at this point.
If you take longer during this stage, your coffee will have more body but less acidity. If you want chocolaty flavor, roast a little longer. If you want fruity flavors, roast shorter.
Second Crack
By the time you start to hear a second crack the roast flavors are going to start eclipsing the origin flavors of the beans. If your beans aren’t that exciting, go ahead and roast them darker. But if your beans have delicate or exciting flavors, roasting to second crack would cover them over.
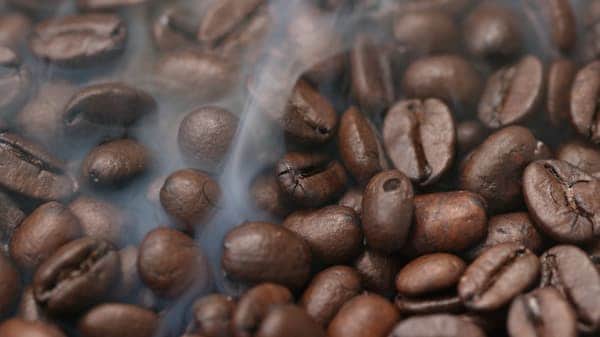
Dark Roast
If you keep roasting past second crack, the smoke gets more pungent as sugars burn completely, and the bean structure breaks down even more. Some coffee shops will list this dark roast point as Full City, or City +.

Shortly after second crack you quickly get to what I call the “Oh no!! Too Late! Roast.” At this point the sugars have burnt up completely and your brew will be a thin-bodied cup of charcoal water.
How to purchase unroasted coffee
Now that you know how to roast coffee beans, the next step is to buy the beans you’ll need. For any home roasting method you’ll need to purchase unroasted, or green, coffee beans. You can get them from your local roastery or order online.
One of the benefits of purchasing green beans and roasting them yourself is that it’s way cheaper than buying roasted beans. That means you can spend your coffee budget on better green beans that you roast according to your tastes. That’s a big plus.
Also, you’ll always have freshly roasted coffee on hand, as long as you don’t forget to roast. That alone elevates your daily coffee experience.
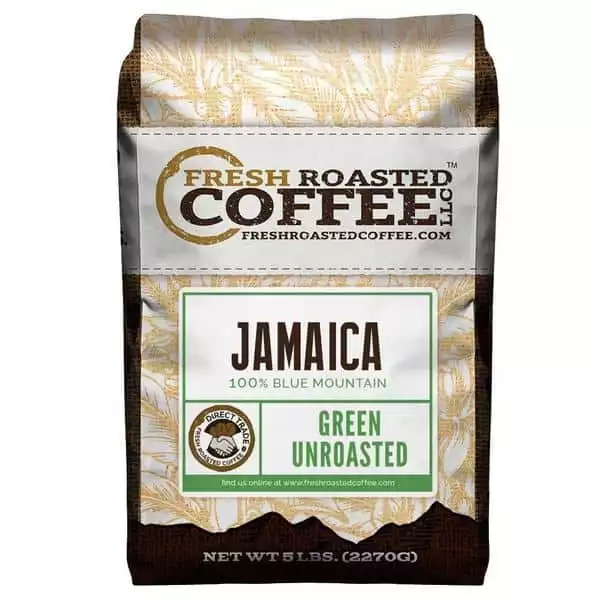
Grown at high altitudes in fertile volcanic soil, these beans deliver the signature flavor Jamaica Blue Mountain is known for. Use coupon SIP10 for 10% off your order!
When you’re just starting out with roasting, don’t worry about what country the beans are from or how they were processed. Just buy an available coffee bean. I would recommend buying one that isn’t too expensive, since you will make mistakes and ruin batches until you learn what you like and how to achieve it.
As you get more experience, you’ll have fun experimenting with a wide range of regions, altitudes, and processing. Along the way you’ll learn how those variables change the characteristics in your coffee.
Green coffee beans, when stored properly, can last 6 months or longer. So once you find a coffee you like, feel free to buy it in bulk and save even more money. I’ll give you tips for storing your unroasted beans at the end of this article.
Set up your home roastery
For most roasting methods, you will want to set up a home roasting station where you have all your equipment on hand.
Choose an area that’s well-ventilated. You don’t want to go to an extreme and have a chilly, breezy space. Simply pick a space where any smoke, chaff, and odors can escape. You can use a fan as an extractor, open a window, or roast in your garage or enclosed patio.
What equipment will you need to have on hand? That depends on what roaster you have, but it may include tools to weigh or measure the beans, what you’ll use to handle hot items, and what you’ll cool the beans with.
What is a roasting profile?
Before we get to the actual roasting process, let’s talk about the roasting profile. A roasting profile is simply how much temperature is applied to the beans and for how much time.
When you roast beans at home, you might not be able to adjust the temperature on your equipment. In that case, your roasting profile is going to depend more on the time you’ll roast.
How long should you roast your beans? We already talked about first crack, that exciting moment when the beans begin to pop. That’s going to be your reference point.

You’ll know you’re at that stage because your beans will sound like popcorn popping. At that point, your beans are technically roasted and drinkable. That’s the point some people call City Roast, which is a light roast that will give you a bright brew.
You can continue roasting for a few more minutes to get a darker roast. When you get to this point it’s essential to keep the beans in constant movement so they don’t char, or burn, on the bottoms or sides. Depending on the roasting method you’re using at home, you can achieve this by continuously stirring the beans. You will soon get to the second crack, which is less intense than the first one.
I recommend timing your roast. When you know how long you roasted your beans, you can repeat it if it turns out well. And if the roast turns out poorly, you can avoid repeating the error. Simply note when you started roasting and when you took the beans off the heat source.
There are free phone apps that help you time the roast and calculate a roasting profile. Or you can just jot the numbers down on a notepad.
After you roast
With any roasting method you’ll need to cool your beans down fast after they reached the desired roast stage. This is important – if you don’t cool the bean, the internal heat will continue to roast them and you may get a darker roast than you intended.
Some home roasters come with a cooling period programmed into the process. If you’re roasting in a pan, oven, or popcorn popper, you can cool beans down fast by transferring them to a metal sieve (or a colander).
Simply place the roasted beans in the sieve and move them around to cool them quicker. If you have two sieves, you can pass the beans from one to another. You can also place the beans in front of a fan.
Keep in mind that the metal sieve will heat up like crazy, so use oven mitts or a kitchen towel to protect your hands. Once your beans are cooled you can put them in a storage container or bag.
You’ll also need to let your beans degas. Yes, your coffee has gas. During roasting, carbon dioxide gets trapped inside the beans. It seeps out slowly over the days and weeks after roasting.
In those first two days when much of the carbon dioxide is escaping, you want to give the beans some breathing room. Don’t seal the container too tight, and preferably leave a vent so the CO2 can get out.
That excess CO2 also means your brew won’t taste that great the first day or two. Too much carbon dioxide in the beans won’t let the water penetrate to create a good extraction.
Resist the temptation to brew your new roast before 24 hours are up. Roasted beans are still optimal for pour-over brewing methods at 2-4 weeks from the roasting date. If you’ll be making espressos, make sure to let your coffee degas for 2-3 weeks first. You might want to consider roasting the amount you’ll need for a week at a time.

4 Ways To Start Roasting Coffee At Home
Now we’re ready to start roasting at home! Let’s go over the most effective ways that home roasters get the job done.
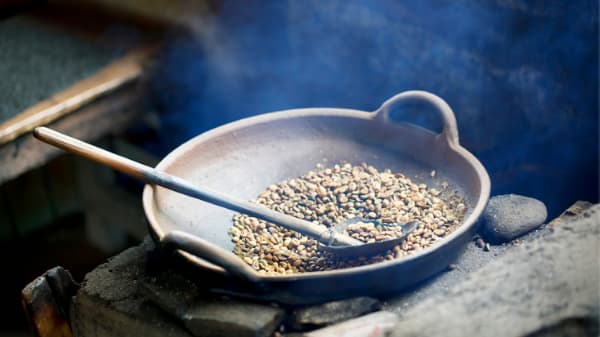
1. In a pan
In many coffee-growing countries around the world, farmers roast their beans in a wide, shallow pan over a stove or fire pit. They continuously stir the beans until they reach the right shade of brown and voilà! They have freshly roasted beans for their family.
This type of home roasting can be a fun experiment, and you should give it a try.
PROS (+)
- You don’t need special equipment
CONS (-)
- Impossible to know exact temperature
- Charred beans
- Underdeveloped beans
What do you need to roast in a pan?
- Large, shallow pan
- Heat source
- Long wooden spoon
- Green beans
- Timer
- Large metal sieve (or two)
- Patience
- Oven mitts
How to do it
Step 1
Heat a shallow pan over a stove or heat source.
Step 2
Scatter the beans evenly in the pan in a single layer.
Step 3
Use the wooden spoon to move the beans continuously until you reach the right roast level. Then put your coffee into a sieve and cool down quickly.
To get to City Roast, you can stop roasting just after first crack. If you want a dark roast, keep a careful eye on the beans because the coffee should reach second crack in less than 3 minutes.
Remember to use oven mitts when handling the pan and the sieve, which heat up fast.
I do want to mention something about roasting beans in a pan. When we went over the roasting stages, we talked about maintaining specific temperatures during each stage.
When roasting in a pan, how do you know what temperature the beans are at? Frankly, you don’t.
Depending on how close the pan is to the heat source, the temperature may be too intense. What will you get from beans that were roasted too fast at excessively high temperatures? A smoky yet underdeveloped brew. Also, if you don’t move those beans continuously throughout the whole process, you will get charred tips.
I’ve had many cups of thin, charred coffee proudly presented to me by farmers. So I’ll admit, roasting beans in a pan isn’t my favorite method. It is a lot of fun, though, so do give it a try.
2. With a popcorn popper
Roasting coffee beans in a hot air popcorn popper is popular with people who roast coffee at home but aren’t ready to invest in more expensive equipment. After all, popcorn poppers are quite cheap and easy to find.

PROS (+)
- Inexpensive
- Can be stored on kitchen counters or in cabinets
- You don’t have to stir the beans continuously
CONS (-)
- No way to regulate the temperature
- Beans tends to roast too fast and can taste underdeveloped
- Chaff gets all over your roasting space
When choosing a popper, don’t use one that has a mesh screen and heating element at the bottom of the popper. This will blow your beans upwards, and potentially knock them out of the popper.
Also, that mesh screen in the bottom creates a problem with the chaff. Chaff is dried husk, or skin, that still clings to unroasted coffee. When you roast the bean, the light chaff loosens off. Chaff can get stuck in that bottom screen and create a fire hazard.
To avoid those problems, choose a hot air popcorn popper that has the air vents on the side. Side vents move the beans around in a circle and don’t let the chaff get stuck.
Also, choose a sturdy popper that will stand up to long roasting sessions. It takes longer to roast beans than to pop corn, and many poppers can’t stand up to the heat. The plastic lids are especially prone to melting.
You can also use a stovetop popper, one of those old methods that date back before air poppers. It has a crank that moves the beans around, which helps prevent them from scorching on the heat source. Although air poppers produce more even results (and you don’t have to crank anything), this is a good option if you want to roast more beans in each batch, up to a pound at a time.
What do you need to roast in a popcorn popper?
- Unroasted coffee
- Popcorn popper
- Long wooden spoon
- Large metal sieve
- Oven mitts or kitchen towels
How to do it
Step 1
If you’re roasting inside, open a window to let smoke and chaff escape. If the day is particularly chilly, keep in mind that the outside temp can lower the temperature the popper will reach.
Step 2
Place about ½ cup of beans in the bottom of the popper. You don’t want to fill the chamber because the beans won’t reach a high enough temperature.
Step 3
Plug in the popper. The beans should spin around on their own, so you don’t need to stir them much. I don’t put the plastic top on the roaster yet, since the heat can deform it. Warning: chaff may start to fly all over the place.
Step 4
Once you get to first crack (at about 3 min), keep an eye on the beans. You can turn off the popper at this point, which will give you a City Roast. You can continue roasting for a few more minutes to get a dark roast. The coffee will darken fast at this point, so keep your eye on it.
Remember to remove the beans from the popper a bit early before to prevent over-roasting.
Step 5
Place the roasted beans in the metal sieve to cool it down (remember to use an oven mitt to handle the sieve and popper).
Tip: Don’t roast under a kitchen cabinet. The air popper heats up to higher temperatures than when popping corn and can damage the cabinet.
Using a popper as a coffee roaster will probably invalidate the warranty. But the freshly roasted coffee is worth it.
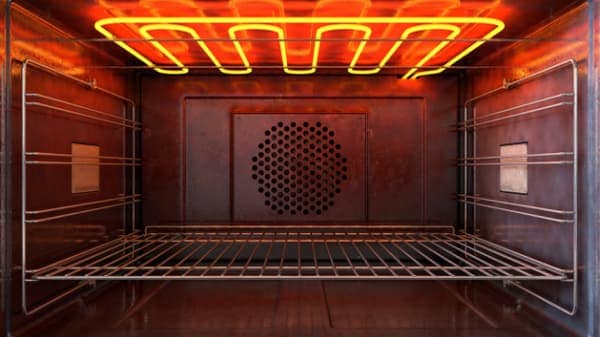
3. In an oven
Roasting coffee beans in an oven is the simplest method. Just put the beans on a cookie sheet, put the pan in the oven, stir occasionally, and remove when roasted.
PROS (+)
- No special equipment needed
- Roasts larger amounts than any other home method
CONS (-)
- Nearly impossible to get an even roast development
What do you need to roast in an oven?
- Unroasted coffee
- Oven
- Baking sheet (optional)
- Shallow pan and/or a stainless-steel collapsible colander
- Wooden spoon
- Sieve(s) for cooling
How to do it
Step 1
Preheat the oven to 500 degrees.
Step 2
If you’ll use the colander, open it flat and place it on the cookie sheet. Spread the beans evenly in a single layer.
If you don’t have a collapsible metal colander, you can place the beans right on the cookie sheet. If you do this, stir the beans every 1 minute while trying to prevent heat from escaping from the oven.
Step 3
Place the cookie sheet in the middle of the oven. After 5 minutes you’ll start to hear first crack. Wait 2 more minutes and check.
Step 4
You will reach City Roast in around 8-10 minutes. At around 12 minutes you may reach a good medium roast.
Step 5
Cool beans completely in a metal sieve – any remaining chaff should fall off at this point. Allow the beans to degas.
I know people who have been roasting coffee in an oven and find it to be drinkable. As a coffee expert and a baker, this is the least appealing option to me. Let me explain why.
The beans need to be in constant movement during the roasting process to get even roast development. If your beans are sitting on a pan in an oven, it’s nearly impossible to maintain oven temperature and constantly stir the beans. An oven roast is generally going to be uneven, which will affect the tastes.
Additionally, most ovens don’t heat up enough. Your best option might be a small gas oven, which can reach higher temps. Don’t even consider using your average toaster oven or countertop oven.
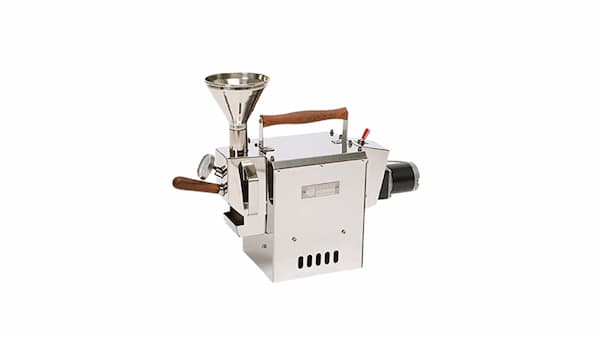
4. With a home coffee roaster
Roasting beans in a home coffee roaster is without a doubt the best way to roast. You can control the temperature, which gives you the power to develop the roast character you want rather than leaving it to chance.
It will generally catch the bean husk so it doesn’t fly around your kitchen. And it will move your beans constantly, ensuring an even roast with minimal effort.
PROS (+)
- Better-tasting coffee
- More consistent results
- Can control temperature
- No fire hazard
- Keeps kitchen clean of chaff
- Roasts larger batches than popcorn poppers
CONS (-)
- More expensive than the other methods
- Too large for some kitchen counters
What do you need to roast in a home coffee roaster?
- Unroasted coffee
- Roaster
- Wooden spoon
- Sieve
How to do it
Step 1
Measure the beans to roast and add them to the roaster.
How much should you roast at one time? That will depend on the roaster you purchased, so follow the instruction manual carefully. If you add too much to the roaster, you could wind up having an uneven roast or even create a fire hazard.
Step 2
If your roasting equipment allows you to choose the heating time and temperature, set them according to the results you’re looking for.
Step 3
Turn on the roaster and allow the beans to roast.
Time the whole process so you know how many minutes after first crack you reach the desired roast level. This will be important to determine the best roasting profile for future roasts.
Step 4
If your home roaster does not have a cooling period, empty the coffee beans into a sieve or colander to cool. Cool beans completely and allow them to degas.
Step 5
Clean out the chaff collector (if applicable).
So…What is the best way to roast coffee?
The winning method for roasting at home is not surprisingly home coffee roasters. This type of coffee roasting machine is specifically designed to roast coffee in an average kitchen setup.
Of course, you might want to start out roasting in a popcorn popper just to get a feel for the process. However, you may quickly get frustrated and disappointed by the irregular results, the lack of ability to develop your roast profile, and chaff flying all around your kitchen.
Upgrading to a home roaster will give you the control you want and the results you need. In the past, these kinds of roasters had ridiculously high price tags. As home roasting has become more common, though, prices have come down and are no longer crazy expensive. You can get a good starter roaster for less than 200 bucks.
For a true coffee lover, this little investment pays for itself fast. Once you get used to drinking coffee roasted at home just the way you love it, you’ll find it hard to go back to anything else. And when you add up the savings by roasting your own coffee, you may find that the roaster pays for itself in a short amount of time.
There are many types of home roasters with wildly diverse ways of roasting. How can you choose the best roaster for your needs? We got you covered in this article with the best home coffee roasters.
Please Invest In Proper Storage!
Now that you know which roasting method is best for you, let’s talk about keeping those beans fresh, both before and after roasting them.
You want to keep the green coffee fresh and away from humidity and odors that can ruin the coffee.
You also want to keep your roasted beans fresh. When you start roasting your own beans , you will become painfully aware of the difference between fresh beans and those that have been sitting around for a few weeks longer than necessary.
After roasting coffee, it loses its freshness within a few weeks. The taste and aromas begin to degrade, and your brew will seem flat.
To keep your beans fresh, you need to understand your enemies. What are the enemies of coffee? Like many edible or drinkable items, your main foes are:
- Sunlight – compromises the tastes
- Oxygen – degrades coffee (think old, stale bread)
- Humidity – damages coffee
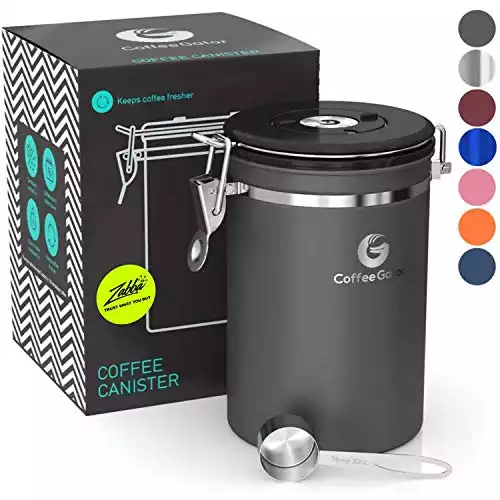
A good canister will keep your fresh beans safe from those degrading elements. While it looks quite pretty in a transparent container on your kitchen counter, it won’t be protected. You should store your beans in a dark container that is airtight to protect them from air and humidity.
If you do love the idea of proudly displaying your roasted beans, you can have a small transparent container with just the amount you’ll use each day, with the rest safely tucked away in a proper storage container.
The Final Verdict: Is Roasting your own coffee worth it?
Roasting your own coffee beans is a fun hobby. But it’s way more than that.
When you roast your own coffee, you get full control. You know how to roast coffee beans to get the best results, and you can do what you want with your chosen beans. No matter what your tastes are and no matter who understands them, you can have the coffee that you want without visiting a coffee shop.
It’s also the best way to truly understand coffee. You’ll know why your coffee tastes sweet, why it has more body, and why it has just the right touch of acidity.
And the process is fast with not too many steps. Compared to baking bread or other kitchen hobbies, you can have roasted beans in under 15 minutes.
Experience the thrill of roasting coffee at home and you’ll probably never go back to buying coffee from a coffee shop.