20 Ways To Make Coffee: A Complete Guide
Coffee can be as complicated as you want it to be, regardless of whether it’s a drip, right through to full-on scientist mode with a siphon coffee maker.
You get my drift. There’s a lot of ways, and some excel at extracting flavor whereas others offer convenience over all else. What do you prefer?
In this post, we walk through 20 unique ways to brew a cup of joe and the pros and cons of each. Remember the best way to make coffee depends on your preferences. So let’s get started with the categories of brewing!
The 4 Brewing Categories
Extraction is the process of drawing flavors from ground coffee. Pressure and time are the 2 main variables when we brew with equipment.
You play around with the best temperature and the ideal minutes, no matter how you brew. Part of it is also knowing what you or the people around you like! Espresso lovers might not enjoy pour-overs, and Aeropress fans might find Turkish Coffee too heavy.
Which is best? Like all modes of extraction below, it will depend on you.
What beans do you get? Do you enjoy a full-bodied brew or something a little lighter? You can mix and match as see fit, including the size of your coffee grinds. A simple variable, even the use of a paper filter, can make a good cup of coffee incredible.
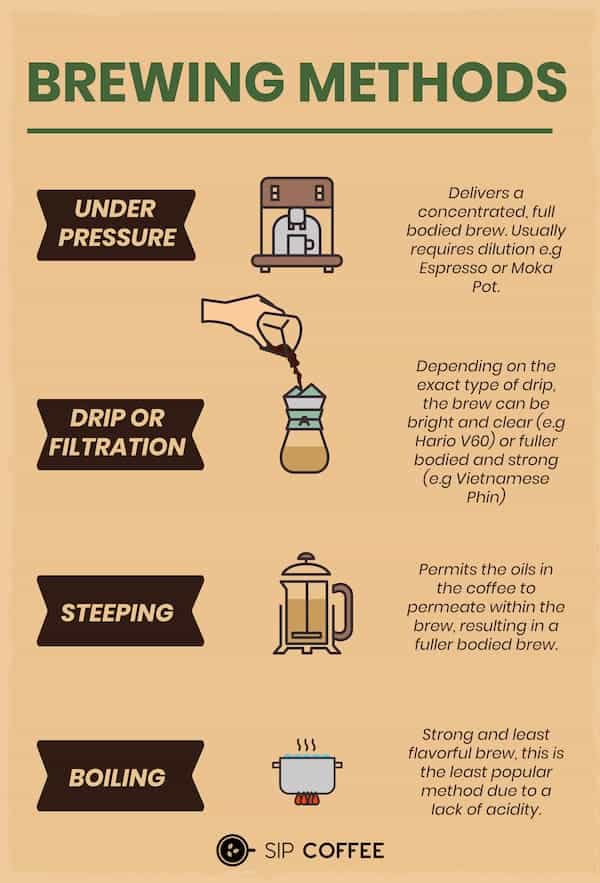
Each brewing process detailed below will fall under 4 primary categories: pressure, drip, pour-over, and steeping.
Let’s get started!
Take note that to make the best brew, you’ll want to find good beans and a good burr grinder. Ensure you use the ideal grind size for each in line with your brewing technique (more on that later). Most people tend to invest in a decent machine or brewer first. Nonetheless, I believe that if you have fresh high-quality beans and a good grinder, you will be able to brew well in any way you decide.
Under Pressure
Based on the principles above, these methods usually have the shortest brew times, and the “strongest taste“. Strength in this regard isn’t just bitterness or sweetness, but the overall taste registering on your tongue.
For some people, this is the best gauge of how “good” a coffee is. Espresso is the most well known of these extraction types.
The high heat during pressurized extractions forces the flavor out of the bean. You will be using a machine or a contraption that adds “pressure” to your extraction. Although, one method within this area might exert significantly more pressure than brewing coffee with another (e.g an espresso machine), for example. More on that later.
With pressure, you can extract coffee faster, and with punchy flavors. Great to dilute with water, or add some milk if you want to maximize your powder grind.
Drip Or Filtration
Drip coffee is a general classification of extraction and equipment. It’s when you utilize the force of gravity to create your brew. While not the best way to make Coffee in terms of flavor, it is the most common way to brew for most consumers.
When brewing coffee via a drip, the water hits the grounds and it causes agitation. This adds a little pressure as it shakes the flavors loose. It passes through the brew basket and ends up in the pot. One important variable that affects your brew quality here is the type of filter used.
You’ll want to get a paper filter if you want a brighter cup. Just make sure to rinse it off to get rid of that starchy taste pre-use with warm water.
From automatic machines you see everywhere to mesmerizing cold brew set-ups, it’s easy to be exposed to brew methods that fall under this category.
Pour Over
This coffee brewing style is generally regarded as the best way to taste and enjoy your coffee. And rightfully so, because pour-overs rarely disappoint when done right. If you want to yield aromatic flavors from your beans, this is a great way to go.
The difference from drip extractions? Pour overs are usually done without a machine. It takes skill to do pours at a pace and angle that exerts the right amount of agitation.
You can think of it like with cars, drip methods are akin to automatic transmission and pour-overs are manual – giving you complete control (good or bad).
The discussion isn’t necessarily about “best,” it’s more of which is a better fit for you. If you want more control, try a pour-over. If you’re more concerned with the time or effort of it then use a drip.
Another important principle to note with this extraction type is controlling immersion time. Pouring too fast can mean the coffee over-extracts. Water can only exit through the limited holes at the bottom, so it gathers in the dripper. This happens when you’re pouring too much too fast for the brew basket capacity. Too slow, and you heat some of the grounds while completely missing the others.
It takes repetition to get familiar with the pouring pace, given that filters and bean particle size affect it heavily.
With the temperature and grind setting required for this style, you extract at a slower pace. The result? A flavor-bomb. There’s a reason this is regarded as the optimum way to taste good beans.
Steeping
The most different extraction type from the rest is steeping. This is the best for those who want low-attention brew cycles.
It’s simply leaving the ground coffee beans to extract in hot water for a set amount of time.
While it does sound simpler than the others, the work is more upfront, and preparation focused. For best results, you want to grind small enough to let the water do its job alone, but big enough, so it doesn’t extract too much.
You need to use clean equipment, use fresh beans (not so necessary with cold brew), and get the proper filtration systems that come with your extraction style of choice. This is why it fits with specific lifestyles and preferences.
The flavors extracted from this style are quite different from the rest too, so it satisfies particular preferences well.
20 Different Ways to Brew Coffee
Did I say a few? “Few” is relative.
Just like enjoying your coffee in several different ways, you’ll have to open your mind and appreciate the new small discoveries along the way!
While it’s useful to have parameters as guidance, swinging one way to another between these thresholds is where you can find your perfect cup.
Let’s take it by general extraction style and run through 20 different ways to brew a cup of joe. Hopefully, you’ll find something (or more) that works perfectly as the best way to make coffee for you!
Under Pressure
As a coffee professional, this is my brewing technique of choice. It’s fast, meaning you can serve quickly but not at the expense of the brew’s taste.
It’s flexible because you can dilute it with water, or add milk and other syrups. It’s a chance to make Turkish coffee-tasting brews at a fraction of the time. Most of all, it’s fun! Just operating different machines or feeling the extraction via various pieces of equipment adds to the overall experience.
On the other hand, as a home-brewer, I still love to enjoy an espresso regularly in the comfort of my own space. It’s fun to take different beans home and see how to brew them the best. A quick cup of joe, easy cleanup, and efficient workflow (yes workflow, I’m always logging my brews!).
Let’s get familiar with some brewing methods that extract flavor at fast times and high temperatures:
1. Espresso
“Espresso” is known as a drink, but it is also a brewing method. It’s the quickest, best way to get a thick-bodied brew in my opinion. While some coffee recipes take 5 minutes to make, you can make 6 espresso drinks at roughly the same time!
You place (very fine) compact grounds in a portafilter basket and lock it back into the machine. Once you begin the brewing process, the device heats water and pushes it through the coffee grinds.
BREW TIME: Espresso takes 20-40 secs to brew on average. The Professional-level speed is pegged at 2-3 minutes per espresso-based beverage. If you’re making espresso at home, though, just enjoy!
GRIND SIZE: Fine grind
TASTE: An espresso is thick with concentrated flavors. It’s versatile in that you can add water or milk, and it will still cut through well!
DIFFICULTY LEVEL (1 easy -10 hard): 10. When dealing with punchy flavors, there’s usually little room for error. Tastes are already exaggerated, so both mistakes and good-calls are highlighted.
GREAT FOR: Medium to medium-dark roasts. Coffee shops. Spacious home-bar kitchen setups. Coffee-appreciating workspaces. Beginner brewers should stick to fully automatic espresso machines. Espresso-based drinks are fast, pleasant, and familiar. Many coffee lovers like us have personal preferences when drinking, and espresso machines allow us to explore and apply our favorites.
NOT RECOMMENDED FOR: Light roasts. Cold brew drinkers. Small kitchen set ups. If you’re new in Coffee, it’s best to familiarize yourself with the different tastes you can get from it first.
Once your palate develops, you’ll be able to like more of what an espresso machine produces.
PROS (+)
- Fast
- Flexible (in terms of variety of drinks you can create)
- Tasty
CONS (-)
- A “small” serving for some people
- Complicated (to make a great tasting, nice-bodied espresso)
2. Moka Pot
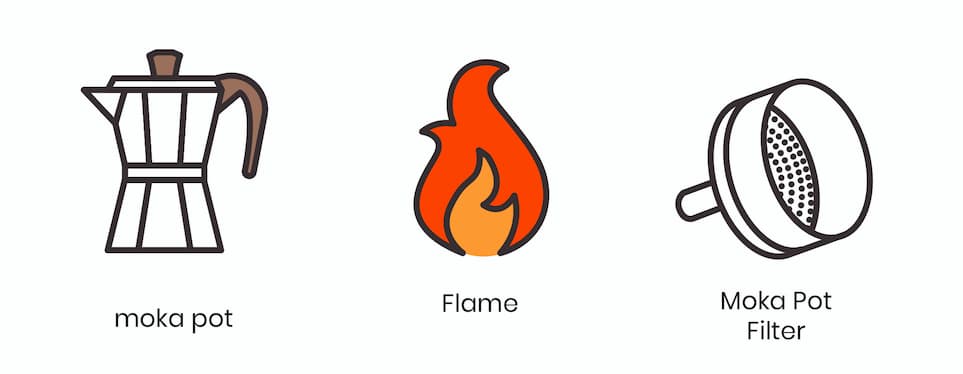
The Moka Pot is known as the counter-top espresso maker.
It’s a staple home-brewing coffee piece of equipment. You’ve probably seen it on a random shelf somewhere.
You place ground beans in the brew basket and fill the reservoir at the bottom with your desired ratio. If a typical coffee is best with a 1:15 ratio of grounds to water, a Moka Pot is at 1:7.
As you can imagine, 1 part coffee beans with 7 parts water is a lot thicker than your usual drip. Pair this with the high heat extraction, and you’re bound to find oils and some potential sediment in your brew. You’ll want to find the best ratio for you as well.
How will you know? When one cup isn’t enough!
If you’re in the market for one, check out our Moka pot reviews.
BREW TIME: 7-9 minutes. It takes 6 minutes for most people to brew using a Moka Pot. And while it has a following with the type of thick, bitter Coffee that it produces, your challenge is creating cafe-caliber espresso with it at home.
Make sure your water temperature is already high before you put it in the Moka Pot. Ensure that your beans are evenly ground. Be sensitive to the hissing sound that indicates that most of the water has passed through the grounds.
GRIND SIZE: Fine to Medium Fine. A powdery grind will give a thick drink!
TASTE: I would describe coffee from a Moka Pot as the cousin of an espresso. It has more water than espresso and less force used to make it.
However, because of percolation and the constant, prolonged high heat, so much oil and fines make it to the final brew. If you leave it sitting long enough, it’s so syrupy that it can feel thicker than an actual espresso. It’s undoubtedly worth mastering or trying at home!
DIFFICULTY LEVEL: 6. It’s challenging to get familiar with the process. Especially if you want to aim for cafe-level home brewing, going past the hissing sound will mean you over-extract your coffee. Using the wrong ratio can inevitably mess up your brew. However, it is possible to master. And once you master it, you can make an espresso-like coffee using a machine that is one-one-hundredth the price.
GREAT FOR: Medium to dark roasts. People who like espresso or thick, flavor-packed coffee drinks. The Moka Pot is also suitable for those who enjoy milk drinks with lots of add-ons, just like espresso.
NOT RECOMMENDED FOR: Light roasts. Those who like their coffee light. It’s also not the best piece of brewing equipment if you dislike being around heat. The prep, handling, and pouring will require consistent exposure to heat!
PROS (+)
- Affordable
- Fun process
- Similar to espresso
CONS (-)
- Not as complex as espresso
- Prone to small burns now and then!
3. Aeropress

Aeropress coffee is the last of the brewing-with-pressure category. In fact, you can purchase an add-on that will allow you to make espresso with it at home!
But before all that, let me explain how it works.
You place your grounds in the open chamber. Once you do this, prepare your (hot) water and seal the small round filter in place. Pour the water into the chamber, invert the press, and push down. Play around with recipes by changing up the immersion times.
You will find resources that go back and forth on up until which point you should push down. I personally don’t push past the hiss to make sure I don’t over-extract. I’ve discovered that my coffee is way more bitter when I push past this point. It’s similar to not fully pressing down on your French Press! But hey, try it for yourself, and see what works. It’s best to find out via trial and error.
Check out our Aerobie Aeropress Review for more info.
BREW TIME: 3-5 minutes. It also depends on your beans and your recipe, or what type of coffee you want to make. Longer brew times make thicker cups of joe.
GRIND SIZE: Medium-Fine. If there’s too little resistance, the grind is too coarse. If there’s too much resistance, then the grind is just too small.
TASTE: Amazing. This piece of coffee brewing equipment has the potential to make light roasts sing if done right. It has more body than a pour-over, with a similar clear flavor profile and ratio.
DIFFICULTY LEVEL: 7. Once you get the hang of it, it’s pretty straightforward. In fact, you’ll probably end up tinkering with your technique just to discover new flavor profiles and recipes.
GREAT FOR: Light and medium roasts. Black coffee drinkers. This is a way to extract flavors to make them come out of your beans.
NOT RECOMMENDED FOR: Dark roasts. Beginners. Those who like their coffee routines are mostly automated. Or people who value consistent drinks over discovering new things regularly. Since everything is manual and reliant on technique, the resulting brew won’t be consistent without practice.
PROS (+)
- Great unique body and flavor
- Affordable
- Easy to use
CONS (-)
- Hard to make consistent brewed Coffee with
- Reliant on disposable filters
4. Steeping
The Aeropress was the perfect lead-in to this next general style of extracting Coffee: steeping.
This mainly involves a coarser grind for Coffee and placing them somewhere you can pour water into and just leave to extract.
After these set times, you’re left with finishing touches before you get to enjoy that fresh cup of Coffee. This involves separating the grounds using filters and pouring the brew out.
4. French Press
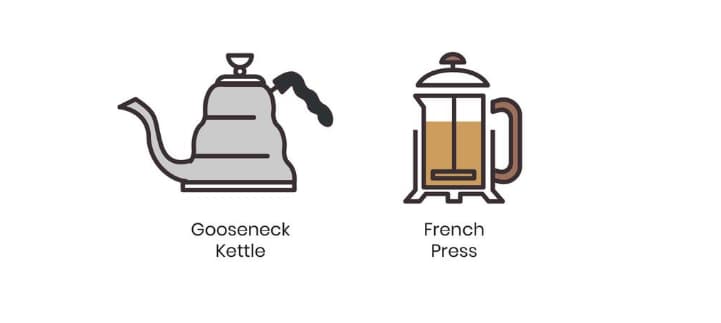
A lot of functional coffee lovers enjoy this brewing style. It’s simple, fast enough, and makes a mouth-heavy brew that’s good for waking you up. There’s something iconic about how French Press cups taste.
You simply put grounds into the press and add hot water, letting it sit for 5 minutes lid on but not plunged down. Then, use a teaspoon to give the mixture a short stir and place the plunger back on for approx 2 minutes (don’t press it down). Towards the final minute, slowly push the plunger down until it lightly compresses the bed of grounds.
I strictly stay within 6-7 mins, especially if there will be some coffee left sitting in the server. However, it’s best-practice to transfer the entire brew to another container when it reaches full extraction.
Pressing too hard will over-extract your brew, and not pressing at all can leave it under-extracted. Try it for yourself and see which among the 3 suits your preferences best!
Related read: What’s The Best French Press
PRO TIP: crossover a bit with drip coffee and run your brew through paper filters. See for yourself how your brew totally changes! Also, experiment by trying a cold brew via your French Press. Steep the beans and push the plunger to separate your Coffee! Remember to grind a lot coarser than usual.
BREW TIME: 5-7 mins. The longer you brew, the more bitter it gets!
GRIND SIZE: Medium-to-medium coarse.
TASTE: Heavy mouthfeel, straightforward. This is because the filters of French Presses are usually metal, and therefore allows more of the oils to pass through to your cup.
DIFFICULTY LEVEL: 2. This is one of the easiest manual brews in existence.
GREAT FOR: Medium to medium dark roasts. Black coffee drinkers. Functional drinkers (meaning they drink to wake up). People who like easy routines.
NOT RECOMMENDED FOR: Light roasts. Coffee drinkers who enjoy unique flavors coming out in their brew. Light coffee drinkers. People who like variety when it comes to coffee.
PROS (+)
- Easy to use
- Inexpensive
- Accessible
CONS (-)
- Not complex coffee
- Plunger can be hard to maintain
5. Softbrew
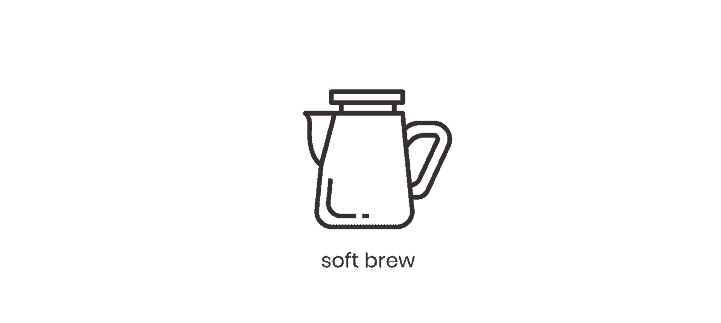
When it comes to coffee equipment, you’re bound to find lots with similarities. The Softbrew could quite possibly be the modern brother of the French Press.
It’s basically a French Press without a plunger, but with upgraded technology. The metal filter is 185 microns in diameter. That’s very small, and it produces a cleaner brew than French Press coffee, but with similar amounts of oil. This is my favorite piece of equipment in the steeping category. Sorry French Press.
Just pour grounds in at a 1:15 ratio of grounds to water, or your preferred recipe. Let it sit and pour out!
BREW TIME: 5-7 minutes.
GRIND SIZE: Medium to medium-coarse.
TASTE: Tongue-coating, pleasantly oily, with clear flavors. What I enjoy most when brewing coffee this way is how it feels like a thicker tasting pour over, but a lot easier to manage. There’s no pouring technique needed, just immerse and wait.
DIFFICULTY LEVEL: 1.
GREAT FOR: Light-medium, medium, and medium-dark roasts. People who like easy-brewing. Complex coffee drinkers. It wouldn’t be far-fetched to say that this produces the most complex hot coffee among the steeping methods.
NOT RECOMMENDED FOR: People who like complicated coffee routines. People who want bitter coffee no matter what beans they end up using.
PROS (+)
- Very easy to use
- Filters out more fines than the French Press, while still allowing oils to coat the tongue in flavors
- Easy to clean
CONS (-)
- Not an exciting way to brew
- More expensive than a French Press
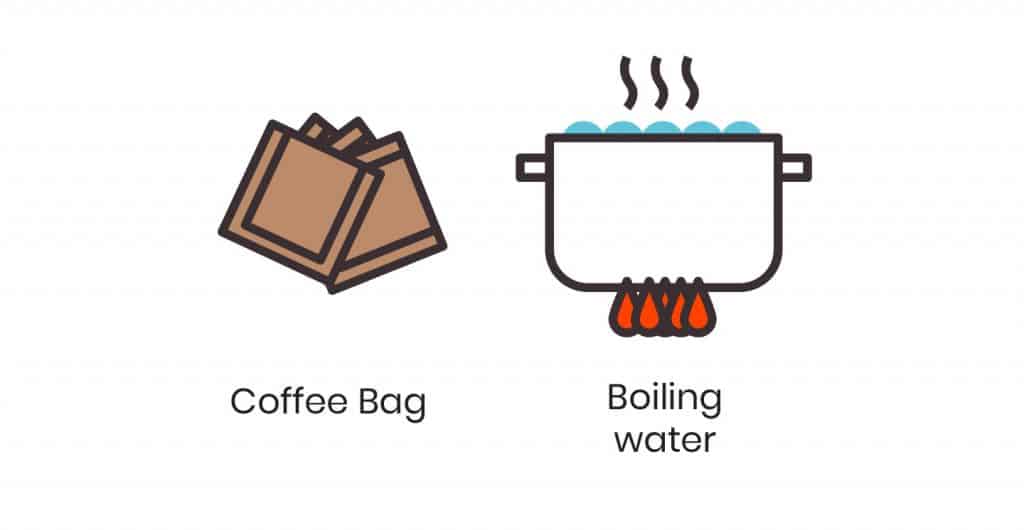
6. Coffee Bags
Coffee bags are commonly used in hotels or airports. As of late, there have been more variations coming out in terms of quality, and this section is a quick look at brewing Coffee from these pre-packed, pre-ground beans.
Once you open the packaging, simply immerse the bag in hot water and try not to forget about it as you read the newspaper or eat your breakfast.
What happens when you forget about it? You’re probably too late to care, so you end up chugging it or having enough cream and sugar beside it to cover your deepest darkest secrets.
A version of this emulates drips, which I personally prefer. All you need to do is pour hot water over pre-packed grounds in a paper and cardboard dripper. But, generally, this isn’t the greatest method to unlock flavor.
BREW TIME: 2 minutes. When the beans smell dark roasted, I lower the brew temperature and shorten the extraction to minimize bitterness.
GRIND SIZE: Pre-determined.
TASTE: Straightforward. Pre-ground beans lose most of their complex flavors minutes after grinding. There is simply no way to keep them in after you grind. The different levels of quality in this brewing realm could be valid, but I wouldn’t usually recommend spending extra coffee money this way.
DIFFICULTY LEVEL: 0.
GREAT FOR: People who travel a lot. Or who have unpredictable days. Coffee lovers who enjoy consistency over complex tastes. Single-cup drinkers!
NOT RECOMMENDED FOR: People who sip coffee for the complex flavors. People who enjoy the process more than the brew.
PROS (+)
- No coffee maker needed
- Easy
- No clean up needed
CONS (-)
- Not the best tasting (it never is)
- Wasteful packaging more often than not
7. Siphon Coffee
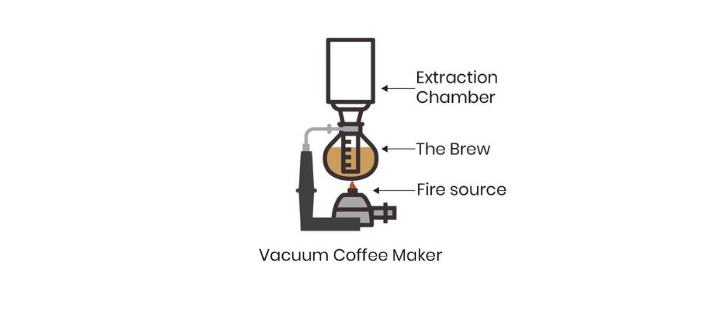
If I could personally give out an award for the most mesmerizing extraction style, this would be it.
My principles for brewing good Coffee are: controlling extraction length, temperature, and ratio. These are easiest to manipulate on digital machines, or as built-in features, but is it possible with a manual brewer like the Siphon?
Absolutely.
As you fill the water chamber (make sure to seal the coffee chamber properly by hooking it in place), leave the beakers tilted to allow the water to heat without boiling. When you get a simmer going, connect the beakers properly, and let the hot water rise to the coffee chamber.
Lower the flame at this point to keep water hot but not boiling, with just enough force to keep it up. Add the grounds, let sit awhile, and switch off the flame when ready.
This is the best way to extract a balanced brew via Siphon. And yes, it’s more complicated than a French Press. Interested to learn more? Check out our Siphon coffee maker reviews.
BREW TIME: 6-7 minutes. From heating the water and immersing it all the way to collecting the coffee, your entire process should be no longer than 7 minutes. I personally take anywhere from 2:30 seconds to 2:45 seconds on average.
GRIND SIZE: Medium. You need to allow for the temperature to get warmer than usual, while ensuring that it’s at a size that will be extracted well within 3 minutes.
TASTE: It’s complicated. I’ve had really good cups from this brew style. However, I’ve also had awful cups. In short, it can be difficult to get right, and when it goes wrong, it’s terrible.
DIFFICULTY LEVEL: 10. There are so many things to follow, and quite a few angles and tricks to learn with this style of brew.
GREAT FOR: Medium and medium-dark roasts. Instagram. And filming your brew process. In terms of actual taste, in my opinion, there’s nothing that the Siphon coffee maker can do that others on this list can’t.
NOT RECOMMENDED FOR: Light roasts. Beginners. People who want simple coffee routines or extraction methods. People who dislike complicated cleanups. Coffee lovers who don’t want to have to keep track of too many variables.
PROS (+)
- Beautiful to look at
- Good practice in handling multiple variables
- A way to generally understand coffee principles
CONS (-)
- Complicated for beginners
- Hard to clean
Filter Or Drip
These next methods will be a mix of automatic and manual brew equipment.
As a recap, drip is simply water passing through grounds and exiting as Coffee. How? Good old gravity, or some force exerted by heat to push water up and through.
No magic when it comes to coffee, but all science. Not the easiest way to extract, but quite possibly the best for a lot of drinkers.
8. Electric Percolator
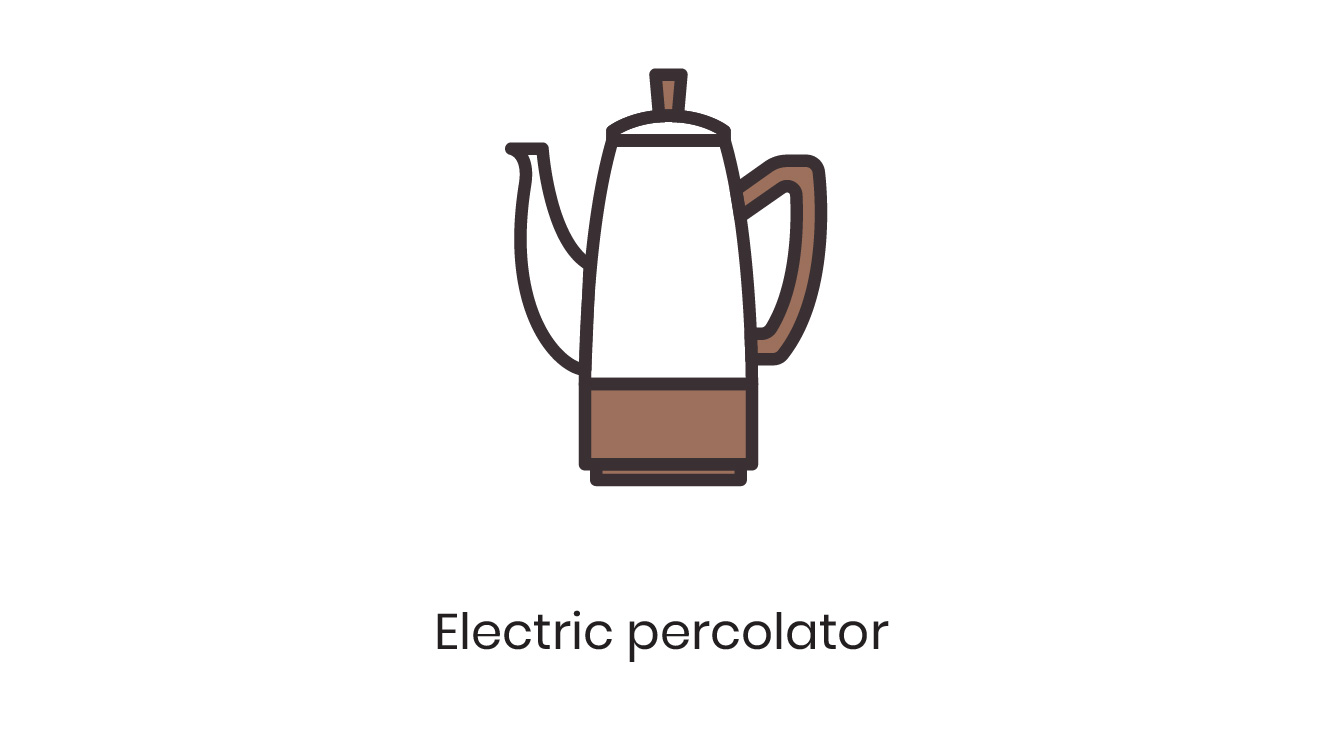
You may have seen this piece of brewing equipment at an old school restaurant. Or a golf course.
It’s pretty standard with a preset brew temperature and corresponding brew time based off of that.
Water is boiled at the bottom of the percolator, then gets pushed up and through the grounds chamber. With a combination of hot water and gravity, your Coffee trickles back down to the percolator’s bottom, ready to pour. It’s best to use a ratio between 1:15 and 1:17. As a bonus, find paper or cloth filters that fit your pot to balance the body out better!
Think of your usual coffee machine except that the mixture inside moves up and then back down again.
BREW TIME: 5-8 minutes. It depends on the rate of heating and the preset temperature that the percolator aims for.
GRIND SIZE: Medium coarse. Percolators are unlike the Moka Pot, where you can preheat the water to shorten contact with the ground coffee.
TASTE: Dark and thick. The usual stainless steel filters don’t keep the fine grind particles out of the final brew. The result is a thicker body, somewhere between a french press coffee and a Turkish coffee. Bitterness will be pronounced given the high heat during extraction, but decent beans will manage to retain some complexity.
DIFFICULTY LEVEL: 1. Since everything is preset and automated, you just load up the brew basket and wait. It’s a simple coffee maker to use that makes plain Coffee.
GREAT FOR: Dark roasts. No-frills coffee drinkers. Older people. As a professional barista, I’ve noticed that old coffee drinkers usually prefer no-frills and more bitterness in their cups. Complex flavors some of us enjoy tend to confuse some older folk. Restaurants that need a regular stream of straightforward coffee will also put electric percolators to good use.
NOT RECOMMENDED FOR: Light roasts. Top-rated coffee beans. People who enjoy the flavor profile of a cold brew. A finely ground coffee will go through the stainless steel brew basket. Even a medium-fine grind will have more leakage than usual, resulting in extended immersion at the bottom. This will not bode well for high-quality beans and the flavors we’re meant to enjoy from them.
PROS (+)
- Affordable
- Consistent
- Easy to operate
CONS (-)
- Makes a bitter cup of Coffee
- Some can be hard to reload
9. Chemex

The Chemex looks like a beautiful vase or a fancy piece of lab equipment. You may have seen this on a coffee shop shelf. Very rarely does coffee equipment look this good.
It is the lovechild of art and science in coffee, created by a scientist passionate about efficiency and improving what exists.
You basically open up the Chemex filters over the top, ensuring that the multi-layered side is over the spout. You can use the standard ratio of 1:15, or your preference.
As you pour, make sure to maintain a bloom over the coffee. A bloom is a “dome” over your ground beans, this occurs when carbon dioxide is released. A bloom signals a good pouring pace: not too fast that the entire dose is submerged, and not too slow that total time is stretched. Both brewing errors will result in over-extraction.
When you’re done pouring, let it trickle. When you reach your target brew time, toss the used filter and grounds, and enjoy!
BREW TIME: 3-5 minutes. It depends on your workflow and the beans you use. Figure out what works best for you and your Coffee!
GRIND SIZE: Medium to medium-coarse. Since this makes more cups than the usual small-capacity drip coffee maker, you will have to grind coarser to keep the pace of bigger servings. Since this is dependent on bean density, roast level, etc. Experiment and record on your own. That’s part of the fun of manual brews!
TASTE: In the pour-over coffee realm, filters are a big deal. Different brands and different styles have been scientifically proven to make a difference in the resulting coffee. For the Chemex, I’ve found that its filter produces a clean, crisp, light brew. You may want to try different grind sizes as well and see what’s best around you!
DIFFICULTY LEVEL: 7. The correct pace and technique of pouring take some getting used to. The best baristas can maintain a good bloom, which affects how pronounced flavors are in the brew.
GREAT FOR: Light, medium-light, and medium roasts. Brewing light and medium roasts. Whether at home or in a cafe, if you like clean, flavorful cups, this may be a great brewing option for you!
NOT RECOMMENDED FOR: Dark roasts. Casual coffee drinkers. All the fuss about pouring and maintaining a bloom can be a turn off if you don’t want to overthink your brew. If you like to brew coffee in the most straightforward ways possible, there are better options for you above.
PROS (+)
- Produces quality coffee
- Larger batches are possible
- Beautiful design (easy to recycle as vase)
CONS (-)
- Reliant on a specific type of filters
- Can be expensive
10. Kalita Wave
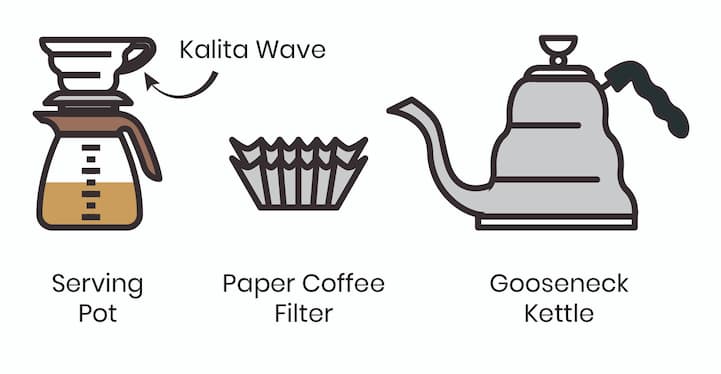
The next few drip coffee brewing methods will be fun to tackle. On the surface, they do the same things: catch ground coffee and allow water to pass through.
However, there’s more science behind each one, starting with the Kalita Wave.
The “wave” shape of the filters lessens contact between the grounds and the inner dripper. This reduces the tendency for over-extraction when a beginner pours too fast since there is less heat during contact.
Liquid tends to build up before trickling down in this brewer, so you get a medium-bodied, fully-extracted brew. A great way to get all the flavors you possibly can from your coffee beans.
It’s not as beginner-friendly as a French Press, but it’s easy enough to use. The very design of the filters allows for more consistency in every cup.
BREW TIME: 4 minutes. You will notice in the pour-over coffee category that there are more ranges than exact times. This is because this type of manual brewing gives you space to play around and apply your own style.
GRIND SIZE: Medium fine to medium. Remember that if you grind too fine, you clog the filter and over-extract. Too coarse and there’s too little contact time with the Coffee. This results in under-extraction.
TASTE: The Kalita Wave is a good drip coffee tool with just the right amount of immersion. Increasing immersion time to thicken the body of your Coffee is a general brew principle, and it’s true for this piece of equipment. With longer extraction times comes clearer flavor-extraction as well.
DIFFICULTY LEVEL: 4. As mentioned above, at the heart of its design is a beginner-friendly filter that sets some parameters for you. It’s hard to achieve consistency with manual brews, but this is at very least is a step closer towards that.
GREAT FOR: Light-medium, medium, medium-dark roasts. New black coffee explorers. Medium roasts. Those who enjoy a balanced, flavorful cup. It is the best way to start with pour-overs while you practice maintaining a bloom!
NOT RECOMMENDED FOR: Light and dark roasts. Coffee drinkers who want to rush. Light coffee drinkers will also find the resulting cups from this brewer a bit heavy.
PROS (+)
- Beginner-friendly
- Produces flavorful Coffee
- Easy to rinse off
CONS (-)
- Reliance on disposable filters
- Comes in limited sizes/brewing capacities
11. Hario V60
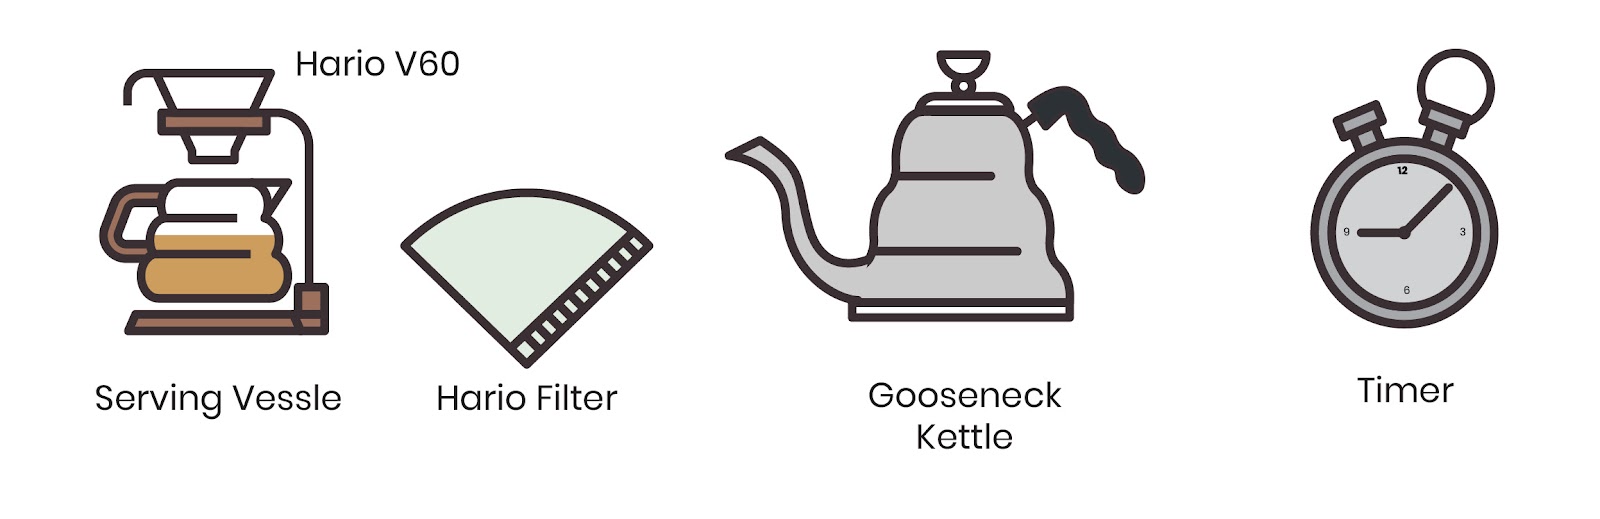
Hario V60’s are often pitted against the Kalita Wave or the French Press as the usual “beginner’s tool.” As you will discover by now, all 3 produce very different cups. Such is the case with different coffee brewing methods.
The dripper’s design is such that it forces the water to run through the coffee bed thoroughly. The result?
There’s less immersion, but more natural agitation. Agitation is a way to extract more flavor from your coffee. Since the design makes it easier for grounds to trickle down to the server, there’s more pressure on getting grind size right with this way of making a brew.
Pouring pace and technique are also more crucial here to be able to stay within an ideal rate of extraction.
BREW TIME: 3-5 minutes. This is the ideal range for 1-2 cups of coffee via this brewing method. It’s quite similar to the brew time of a French Press, but there’s a lot more movement and attention needed to execute this properly.
GRIND SIZE: Medium fine to medium. You will have to familiarize yourself with the effect of roast levels and grind size to master brew pace. Since there’s no guide via immersion, you will have to target falling within the aforementioned range to get the best-balanced cup.
TASTE: Coffee from the Hario V60 is much brighter than Coffee from the Kalita Wave or the French Press. It’s light, aromatic, and pleasant because of the lowered chance of over-extraction.
DIFFICULTY LEVEL: 6. It’s a step more difficult than other manual pour-over coffee methods because of the heavy reliance on pouring technique and grind size. If the flow is too slow, you’re grinding too fine. If it’s too fast, your grind is too coarse.
GREAT FOR: Light and light-medium roasts. The beans and flavors you extract with a Hario V60 line up perfectly this way. It’s also an excellent brewing method for those who drink coffee black, as it brings a lot of variety and good flavor forward. Advanced coffee drinkers will also understand the flavor variances enough to know how to fix their routines with the V60.
NOT RECOMMENDED FOR: Dark roasts. New coffee drinkers. I’ve found that getting people to discover bright and acidic coffee flavors is a tricky slope. It’s always easier to grow into those flavor notes and start with chocolatey and nutty ones first. People who want low-attention coffee brewing also won’t appreciate this style.
PROS (+)
- Produces light, bright, flavorful cups
- Easy to clean
- Comes in many colors and build materials
CONS (-)
- Limited sizes available
- Reliance on disposable filters
12. Vietnamese Phin
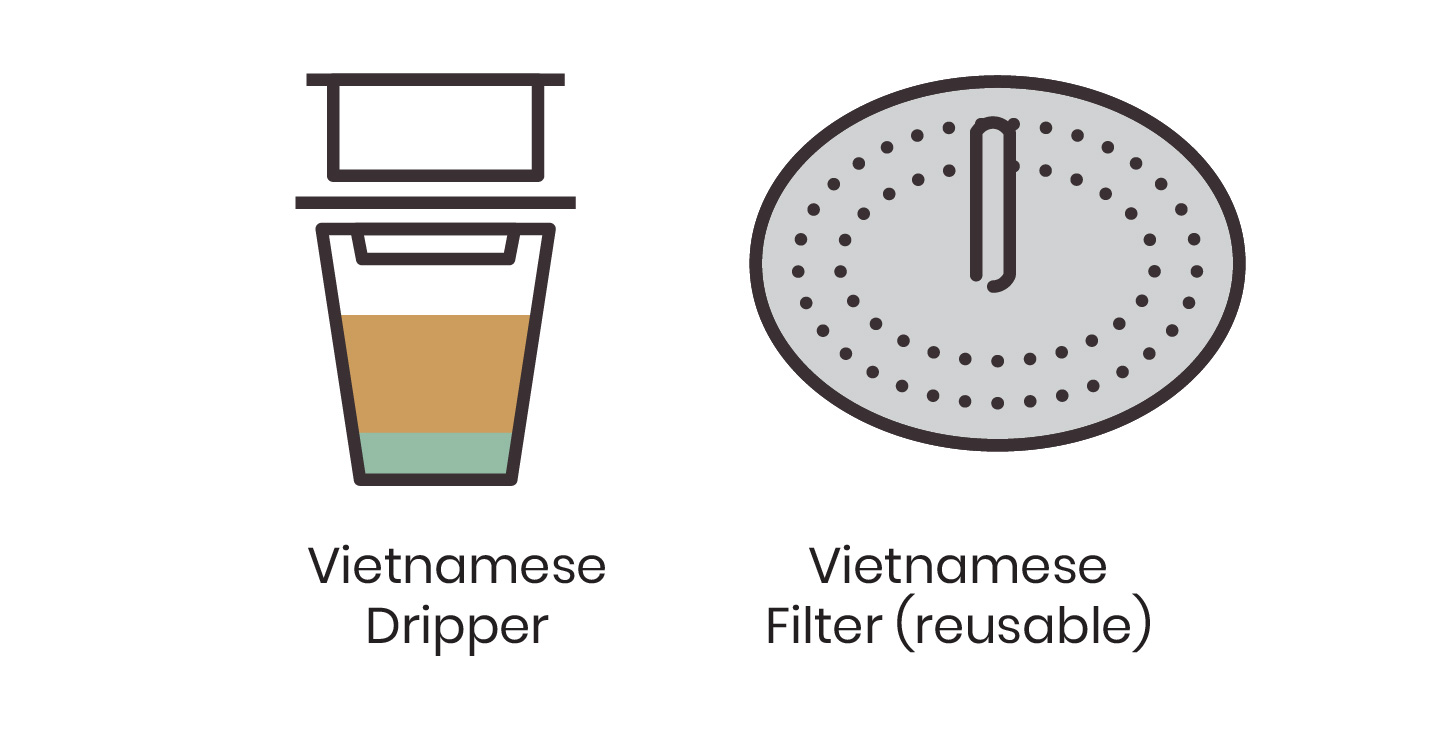
If there were a Frankenstein coffee extraction style, this would be it. It’s a mix of different steps from different coffee makers. In every cup you brew, you will be passing steeping and pour-over coffee principles for proper extraction.
To start, measure, and place your grounds at the bottom of the Phin. Use the filter to even out and compress the coffee bed (an espresso-like step). When this is complete, pour enough water to allow the grounds to pre-soak or bloom (a page out of pour-over 101).
After the initial phase, proceed to fill up to your desired coffee density. The general ratio used is anywhere from 1:9 to 1:10. Let it sit for 4-5 minutes (similar to the French Press).
The last phase of brewing via the Vietnamese Phin is simply pouring into your cup. Usually, you set up your workflow to pre-mix any milk or sweeteners, with Coffee being your final, finishing touch.
Related read: Our favorite Vietnamese coffee
BREW TIME: 3-4 minutes. If you make Coffee with this style, the different brew phases tend to add to the total time.
GRIND SIZE: Medium to medium-coarse. Since the Vietnamese Phin filters are porous (and bigger than a French Press mesh), you want to minimize the sediment that reaches your cup. You do this by grinding more coarsely when compared to our last few modes of extraction.
TASTE: Vietnamese coffee recipes usually use dark roasted robusta beans. Robusta generally is known to be bitter and less complex of a bean vs arabica. This is one reason traditional Vietnamese coffee often features condensed milk, which cuts the bitterness from the beans.
DIFFICULTY LEVEL: 5. You need to create the right movement and flow to keep track of this extraction style, and it requires attention to get right. If you’re taste sensitive, just leaving it in one phase of brewing for too long will disappoint your taste buds.
GREAT FOR: Milky Dark roasts. Medium-dark roasts. Milky coffee lovers will love the thick black Coffee this produces, especially if you use arabica beans. It can make an excellent base for many different add-ons.
NOT RECOMMENDED FOR: Light roasts. People who enjoy light roasted coffees or bright flavors. It’s easy to over-extract with this style, and those flavor notes get overpowered during over-extraction.
PROS (+)
- Fun extraction method
- Allows for experimentation with many different recipes
- Easier to clean than a French Press because of the bigger filters
CONS (-)
- Many variables and stages to keep track of when brewing
- Not suitable for light roasts or finely ground beans
13. Clever Dripper
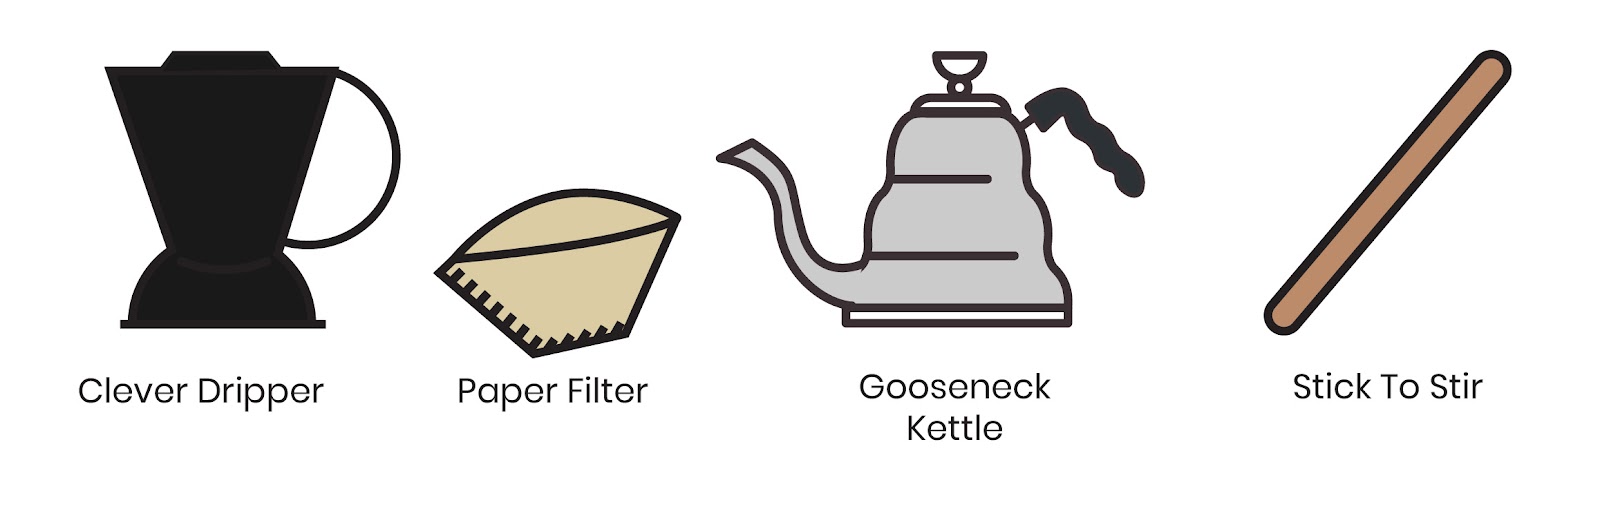
Another hybrid brew style on this list is the Clever Dripper.
It combines immersion with dripping to produce flavorful, heavy Coffee. Think French Press and V60!
You start by placing grounds inside the filter you use for the dripper. Remember to fold on the bottom and the side. Use a 1:15 to 1:17 ratio for the best results.
From this step, immerse for a minute, and break the bloom or crust that forms. These are gasses that keep some grounds afloat, so stirring allows them to sink and evens out extraction. After 2 minutes from breaking the crust, simply place the Clever on your coffee cup and voila! You’re making Coffee like a pro!
The drawdown (the coffee going from the filter to the cup below) from the Clever to your mug should be within 1 minute. When you brew coffee this way, a long drawdown means that your grind size is too fine, and a fast drawdown means your grind size is too coarse.
BREW TIME: 4-5 mins total. This includes the 3-4 minute steep and the 1-minute drawdown.
GRIND SIZE: Because there is some steeping involved, you will have to grind coarser than your usual pour over coffee method. It’s closer to French Press. Worried about the drawdown? The steeping thickens your brew, so there’s a sweet spot for drip coffee with the Clever. It might take a few terrible cups before you find it, but rest assured it’s there!
TASTE: Coffee with this method will taste similar to a French Press’. The only difference is that a Clever immerses a finer-medium-grind, so the flavor scale is slightly different. Expect more brightness from your brewed Coffee using this method.
DIFFICULTY LEVEL: 3. Figuring out the correct grind size is the only reason there’s any complexity in this method of brewing coffee.
Otherwise, it’s a simple, reasonably consistent way to brew manually. It’s very soothing to watch compared to other coffee makers.
GREAT FOR: Light-medium to medium-dark roasts. People who enjoy watching their brew routine! The drawdown is satisfying to watch. Clevers are also good for people who enjoy medium roasted beans, and full-bodied, flavorful cups.
NOT RECOMMENDED FOR: Light roasts and dark roasts. People who like light black Coffee. The steeping involved with the Clever thickens your brew. So if light Coffee and bright flavors are enjoyable to you, you might have better options above.
PROS (+)
- An easy and fun way to brew Coffee
- Basically a more flavorful French Press method
- One of the easier coffee brewing methods that yields excellent results
CONS (-)
- More complicated to clean than your average drip coffee equipment
- The thickness of your brew (without messing with ratio) is pre-determined
14. Melitta Ready Set Joe
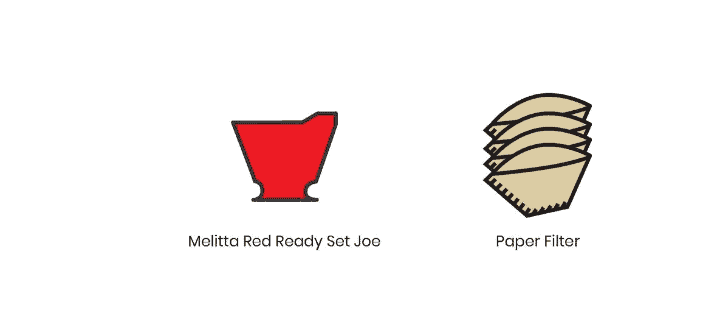
If you look at the design of the Melitta Ready Set Joe, you can see that it’s a drip extraction pour-over coffee. It’s designed to utilize a little bit of immersion too. As a result, it’s similar to the Kalita Wave, except that it uses the traditional disposable filters.
What does this imply? There’s more contact time with the grounds and hot water. This means higher temperature, more extraction, and a thicker coffee than your usual pour over. Making Coffee with this Melitta dripper is closer to a French Press in flavor profile.
You load the paper or cloth filter inside the cone and pour at a steady pace. It’s ideal to pre-wet the disposable filters with hot water to improve temperature consistency and rinse off the paper taste. You’ll want to maintain the bloom as usual, and keep brew times within a strict range to avoid over-extraction.
BREW TIME: 3-5 minutes. Make sure to keep your brewed Coffee within these times. It’s easy to over-extract when the trickle is slow or the fine grind restricts your drink too much.
GRIND SIZE: Medium.
TASTE: Thick, straightforward, with potential to bring out some complex flavors with the correct coffee brewing technique.
DIFFICULTY LEVEL: 4. Like the Kalita Wave, it’s built to compensate for fast-pouring mistakes, but there’s also a finite range of room for error. You’ll want to focus on finding the correct grind size for your beans and your usual serving. It’s essential to keep your coffee brewing less than 4 minutes.
GREAT FOR: Heavy coffee lovers. Straightforward coffee tastes. French Press lovers who want a little more complexity or just a new routine with a familiar taste. Beginners in Coffee who want to get a feel of pour over techniques in brewing Coffee.
NOT RECOMMENDED FOR: Light-black coffee drinkers. People who look for bright flavors, who hate bitterness in their cups.
PROS (+)
- Easy to clean
- Simple to use
- Affordable, comes in different variants
CONS (-)
- There’s a reliance on disposable filters
- Serving sizes are limited
15. Beehouse Dripper
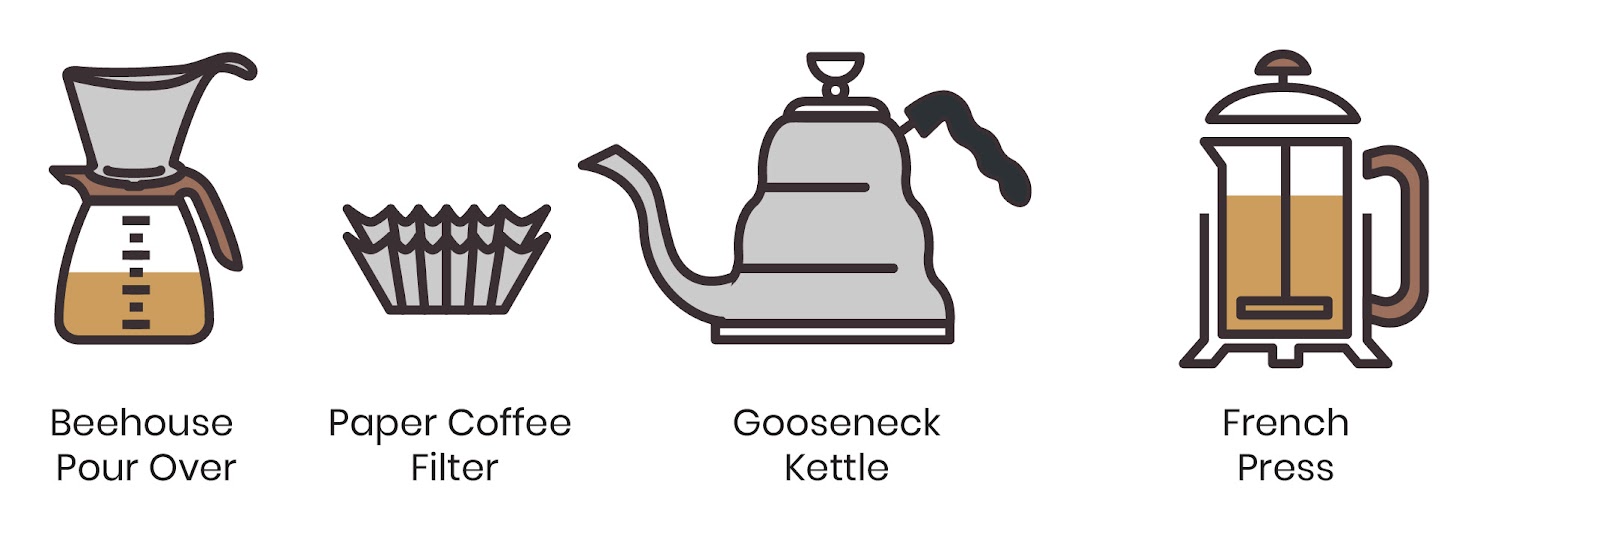
The Beehouse Dripper is to the Ready Set Joe what the V60 is to the Kalita Wave.
They all do the same type of coffee making, but the difference is in the details.
Like the V60, the Beehouse Dripper allows the Coffee to drip faster. The best-brewed coffee is achieved with the correct pouring technique.
Simply place a flat cone filter into the dripper to start. The lack of steeping time is brought about by the 2 holes at the bottom of the dripper. The trick is to figure out the grind size to help control follow.
BREW TIME: 4 minutes. Depending on the roast type, it’s ideal for falling within range when you brew coffee with this method.
GRIND SIZE: Medium-fine to Medium.
TASTE: You usually get a well-rounded cup of pour-over coffee using this method. While it will depend on your pour’s pace, your Coffee will be on the lighter and brighter side in terms of flavor. You may get different results from different brew time and grind size combinations.
DIFFICULTY LEVEL: 5. The V60 and Beehouse dripper brewing methods require more skill than the Ready Set Joe and the Kalita Wave to yield flavor. So they get a full point extra in terms of difficulty. With less immersion time built into the natural flow, there’s less extraction from just the dripper itself. It’s an excellent way to get familiar with how to brew coffee at home!
GREAT FOR: Light, medium-light, and medium roasts. Black coffee drinkers. People who enjoy light to medium-light roasts. Home-brewers who enjoy the process and nitty-gritty of making each cup of Coffee.
NOT RECOMMENDED FOR: Dark roasts. Those who enjoy dark roasts or milky Coffee will not particularly enjoy Coffee from this method. Also, those who want to brew Coffee as easy as possible could find pour overs a bit of a hassle when done daily.
PROS (+)
- Produces light, flavorful Coffee
- Affordable
- Great way to enhance understanding of the effect of temperature, grind size, extraction time, and ratios when you brew Coffee
CONS (-)
- Reliant on good pouring technique and timing
- Challenging to make consistent cups of Coffee
16. Cold Drip
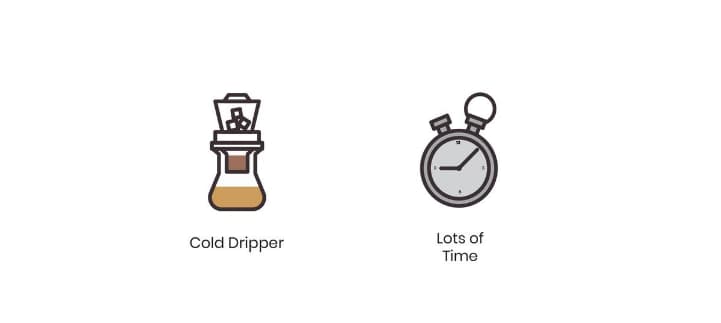
Another one of those captivating brewing methods is the cold drip.
It’s a mix of different elements coming together to produce a unique cup of brewed Coffee. You’ll want another serving right away to thoroughly assess how the taste is different from a hot brew.
You start with room temperature (or cold) water in a reservoir. Adjust the pace of the drip. About one drip per second like a leaky faucet is ideal. Once this is set, place your filter on top of the grounds chamber so that as water gathers on it, extraction is evenly spread.
Wait until extraction is over. This takes hours, depending on how big a batch you’re making. Periodically check on the water flow rates, and the grounds as these may get clogged from time to time. I’ve used anywhere from a beaker to a pot.
BREW TIME: 12-24 Hours.
GRIND SIZE: Coarse.
TASTE: The absence of heat leaves some of the coffee grounds’ reactive acids in the beans. You get an entirely different flavor profile when you brew cold. In fact, use your favorite beans and try this method. Compare with the profile when you brew hot.
DIFFICULTY LEVEL: 2. Just check on it regularly while you brew to avoid over-extraction.
GREAT FOR: Good quality beans. People who like easy-brewing.
NOT RECOMMENDED FOR: People who like bitter Coffee. Or people who enjoy complicated brewing processes.
PROS (+)
- Easy brewing
- Entirely new flavor profile
- Less acidic than hot brew coffee
CONS (-)
- Long brewing time
- Some may find it tastes strange being so different
17. Nitro Cold Brew
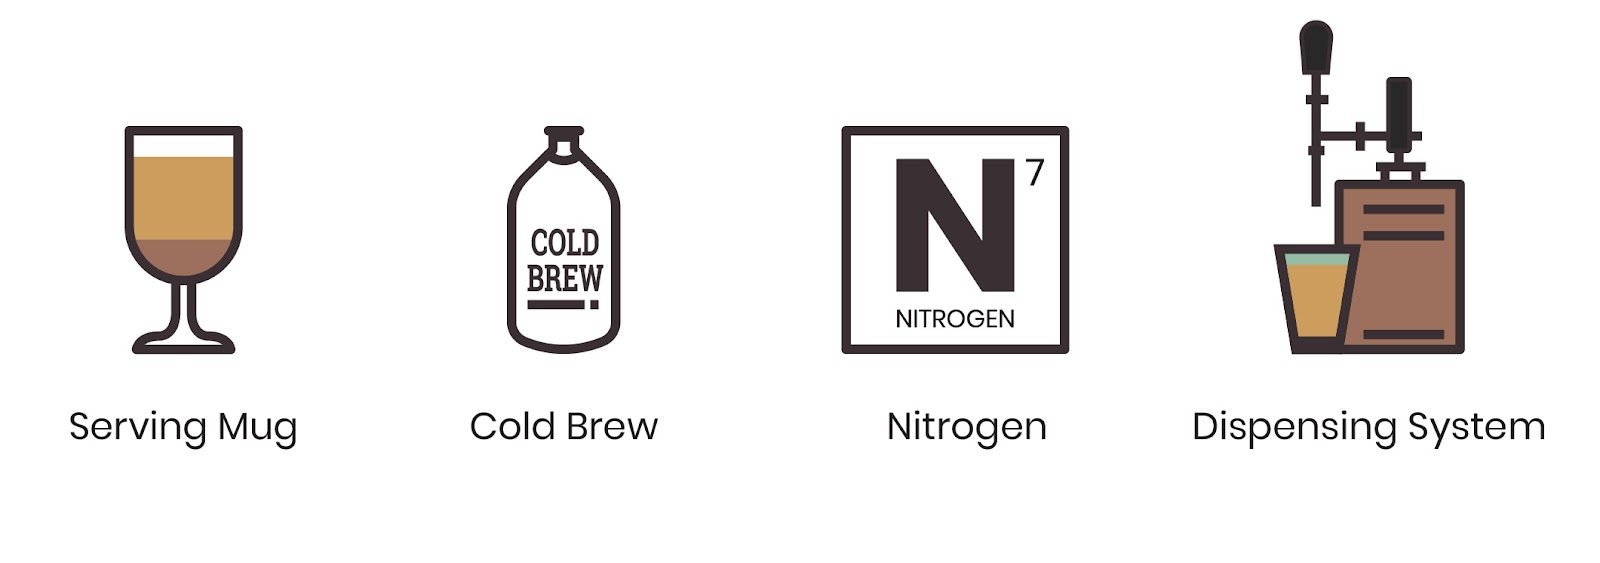
This cold brew method is a coffee-making technique that involves introducing food-grade nitrogen gas into your Coffee.
It was invented for lactose-intolerant people, to add thickness to their cold brew without adding dairy milk.
Adding nitro has no direct effect on taste, only on the perception of flavors. Think of it as a magnifying glass. What’s good is better. What’s bad is worse.
You will need nitro gas tanks, nitro regulators, and a dispensing unit. It’s a bit of an equipment upgrade, but if you’re passionate about cold brew, this may be a good home project for you.
BREW TIME: at least 4 hours to incorporate nitro with Coffee, but 1 minute to drawdown.
GRIND SIZE: Coarse.
TASTE: Thicker body, sweeter.
DIFFICULTY LEVEL: 8. You need to get familiar with injecting nitro and controlling the levels of nitrogen.
GREAT FOR: Cold brew lovers. Lactose intolerant coffee drinkers.
NOT RECOMMENDED FOR: Hot coffee lovers. Bitter coffee lovers.
PROS (+)
- New and exciting texture
- Enhances already-good cups
- Storing cold brew in kegs increases shelf-life
CONS (-)
- Expensive upgrade
- Nitro routine takes getting used to
Boiling
This last extraction method primarily uses heat and water to extract Coffee.
All you need is a heat source and a pot. Coffee brewing using this method takes lots of practice and familiarity for consistency.
The benefit? You can make Coffee anywhere. The kitchen, a bar, and outdoors just to name a few.
18. Cowboy Coffee
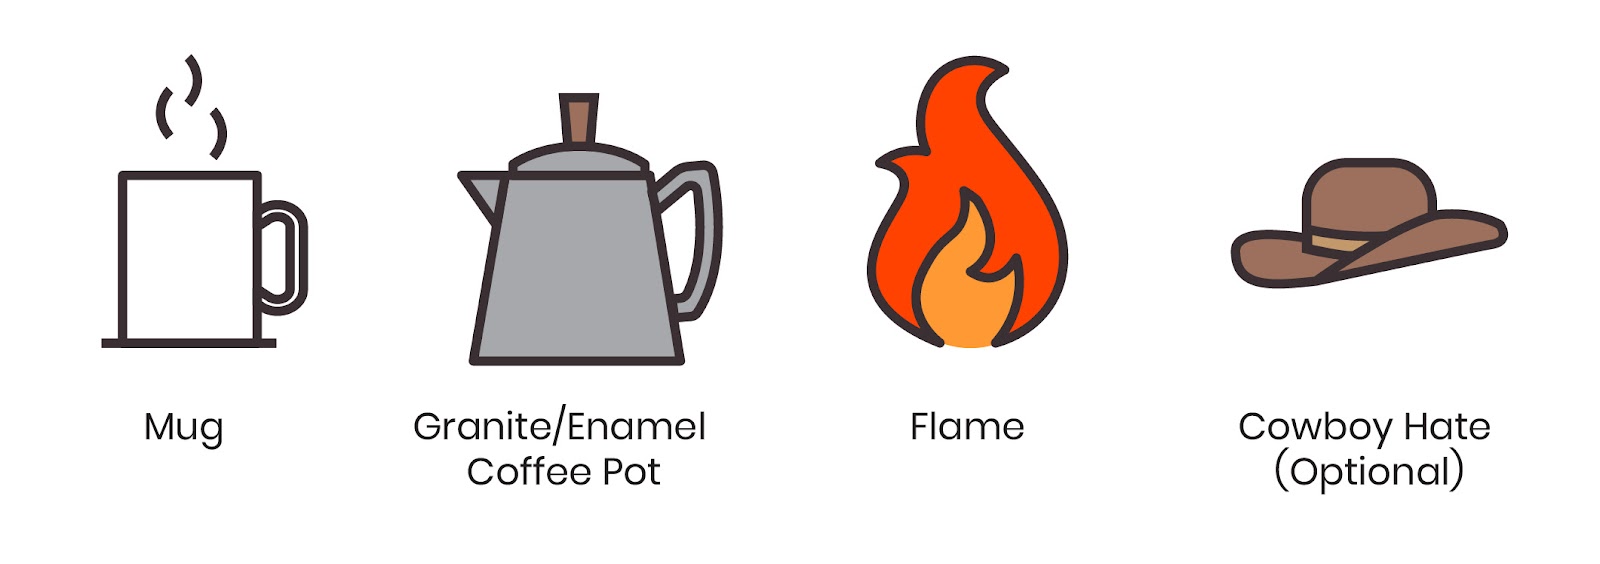
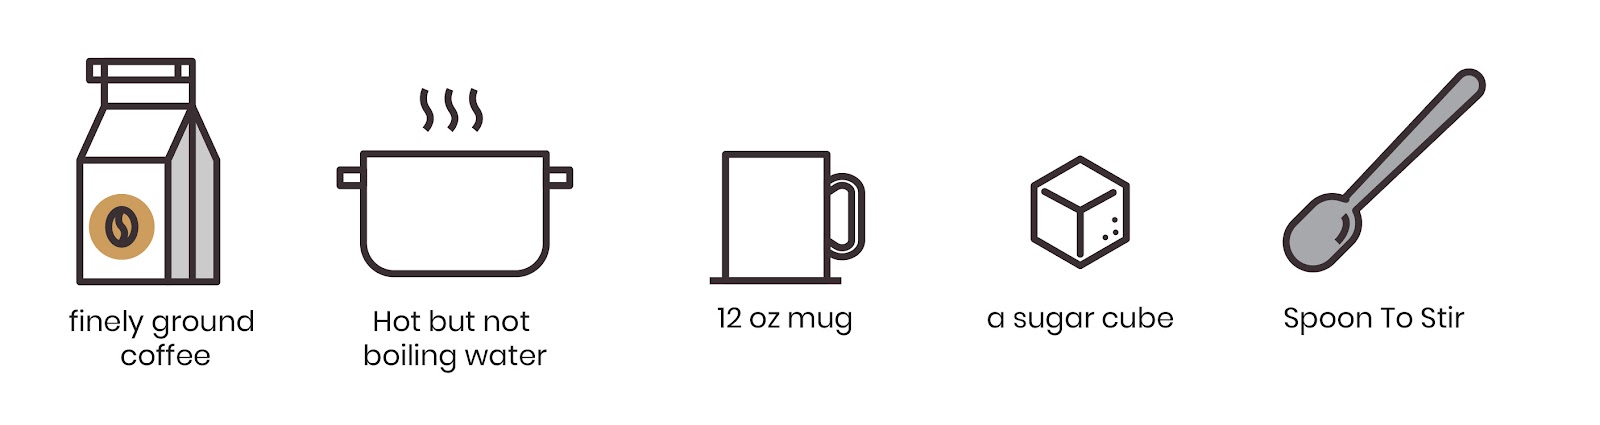
Just as the name suggests, you can make this Coffee anywhere! All you need is heat, a pot, and some potable water.
First, bring some water in a hot pot to a soft, slow boil. Remove from the heat source and add the grounds. Leave brewing for a few minutes. When the Coffee floats to the top, remove and pour!
Expect a lot of coffee grounds in your cup, but hey, that’s better than no coffee!
BREW TIME: 7-8 minutes
GRIND SIZE: The coarser the better.
TASTE: Bitter. Thick. Brackish. But is lousy Coffee is better than no coffee?
DIFFICULTY LEVEL: 3 or 4. Just because of the setup and the cleaning if you do it outdoors.
GREAT FOR: Outdoorsy people looking for a unique experience.
NOT RECOMMENDED FOR: Coffee people who are sensitive to taste! Cold brew drinkers.
PROS (+)
- You can do it anywhere
- It looks cool
- No electric coffee maker needed
CONS (-)
- Doesn’t produce a tasty brew
- Impossible to make regularly (no idea why you’d want to though) unless you’re outdoors every day.
19. Turkish Coffee
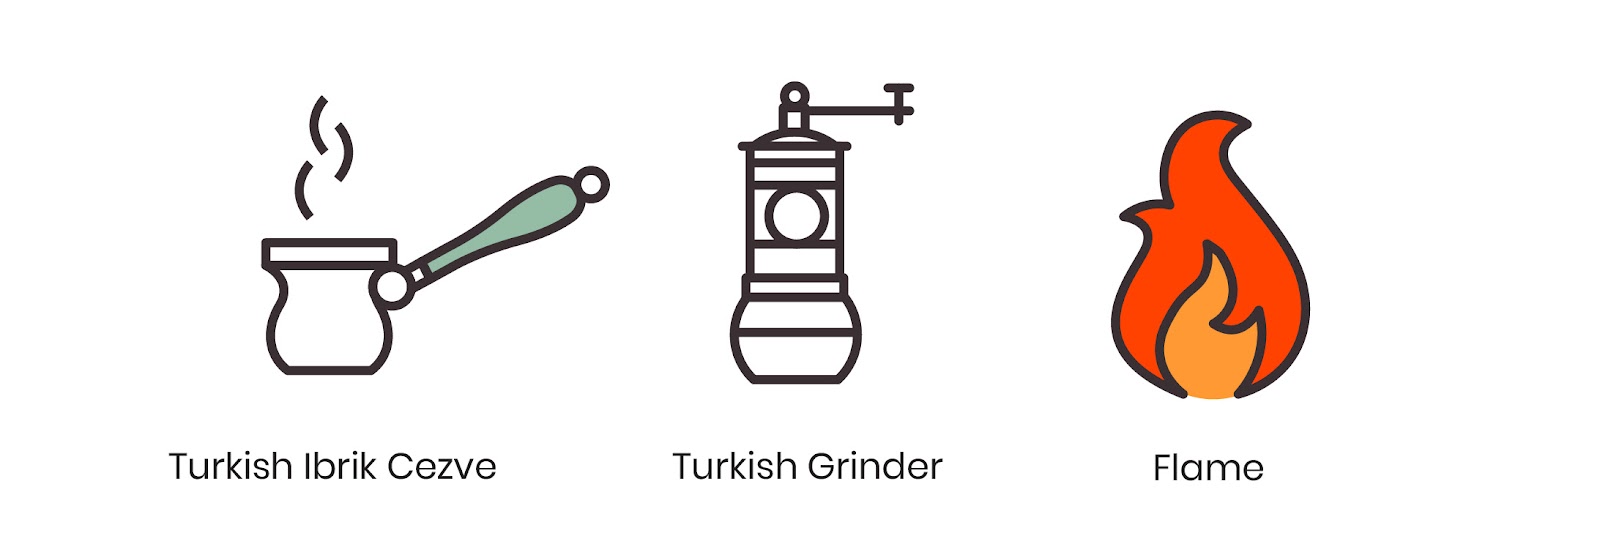
Turkish Coffee is an iconic method of brewing. What’s different about this way of preparing Coffee is that some of the finely ground coffee is supposed to make it into your cup.
With the French Press this happens by accident, with Turkish Coffee it’s evenly distributed across multiple servings!
While this isn’t known as best coffee making practices, it’s still an experience worth trying out! Who knows, it could be for you.
To brew this way, you’ll need an ibrik or a pot that can handle high heat.
Bring Coffee, water, and sugar to a pre-boil. Once boiling, take off the heat, distribute the fines in each serving cup, and experience one of the oldest extraction modes in existence!
You may adjust the sweetness level or eliminate it. I strongly suggest sweetening your coffee to balance out the flavor.
BREW TIME: 3-5 minutes.
GRIND SIZE: Fine.
TASTE: Thick and bitter! It’s like a big cup of espresso but its more bitter!
DIFFICULTY LEVEL: 5-6. While it’s simple enough, it takes skill to make this type of coffee. How to make it drinkable is a challenge that’s made a bit lighter by adding sugar WHILE you brew. This is part of what makes Turkish Coffee stand out.
GREAT FOR: Adventurous coffee drinkers! You may want to try it at least once!
NOT RECOMMENDED FOR: Light roast drinkers. Cold-brewed coffee drinkers. People who have sensitive tastes when it comes to Coffee.
PROS (+)
- Can be done anywhere
- No electric coffee makers needed to make it
- Gives a different taste profile especially when brewed with sugar
CONS (-)
- Impossible to bring out brighter flavor notes
- Having fines in your cup may affect your experience
20. Kopi Tubruk
This is Indonesia’s Turkish Coffee.
The main difference? You use coarsely ground Coffee.
In terms of grind size, head-to-head, that’s like comparing pour-over Coffee will cold brew. Or even espresso with a Moka Pot. You may or may not like one, but “best” will mostly be relative to you.
BREW TIME: 7-8 minutes.
GRIND SIZE: Coarse.
TASTE: Thick. Bitter.
DIFFICULTY LEVEL: 5-6. It’s another one of the coffee brewing methods with sugar, so that helps with making it easier to like. I consider these countertop espresso types, which may or may not work for some.
GREAT FOR: Adventurous coffee drinkers. Those who like the process more than the fine flavors.
NOT RECOMMENDED FOR: Those who like bright fine flavors and light-bodied coffees.
PROS (+)
- Can be made anywhere
- Good for those who like sweet coffees
- A fun way to brew
CONS (-)
- Cup is straightforward
- It’s like many modes of extraction from different origins

Summary
Now that we’ve gone through some 20 coffee brewing methods, I hope you’ve seen some interesting one’s you’d like to try out.
When it comes to finding your ideal cup of coffee, remember that the set up is more critical than the brewer. That includes good beans, a good burr grinder, and an understanding of which direction to take in terms of grind size, temperature, and extraction time.
P.S incase you noticed, yes I know we missed Instant coffee. That’s not a ‘brewing method’ in my opinion, so it’s not listed. Although, yes it’s over convenience!
So go ahead and choose your coffee maker and get to brewing! Enjoy!